Construction and demolition are responsible for 39% of worldwide carbon emissions, which is expected to double by 2050. Along with that 23% of the national waste stream is estimated to be C&D waste, which is also increasing at an alarming rate. The need to build and manage construction waste has become a necessity.
In response to learning from the past and the transition of natural architecture, new materials can be created in a variety of methods, such as through low-carbon replacement, recycling, performance enhancement, and 3D printing.
Therefore, the research sits at the intersection of Additive manufacturing and the ancient method of building with clay. This research not only investigates more environmentally friendly materials and enables new construction processes, but it also attempts to influence the cornerstone and direction of design concepts, resulting in new architectural styles with new perceptions and experiences.
WHAT IS CERAMIC 3D PRINTING?
Ceramic 3D architecture printing, also known as 3D clay printing, is a type of additive manufacturing that can create bespoke products from small components such as architectural furniture or large-scale, fully-printed structures. The possibilities are endless, and it may be utilized to construct forms that would not be possible using conventional ceramic manufacturing procedures
Ceramic 3D Printing Process:
• A print head/nozzle is mounted onto a robot arm or gantry.
• The print head/nozzle is connected to a pump with a hose pipe.
• The components of the material are mixed.
• The mix is pumped into the print head/nozzle.
• Lines are extruded on top of each other.
• Additions or admixtures can be added to alter the properties of the mix
• The print head/nozzle is connected to a pump with a hose pipe.
• The components of the material are mixed.
• The mix is pumped into the print head/nozzle.
• Lines are extruded on top of each other.
• Additions or admixtures can be added to alter the properties of the mix
Equipment:
• Positive action pan mixer for cementitious materials
• Pump for conveying freshly mixed material continuously
• Sufficient length of pipe to connect the pump and print head
• Robot arm or gantry, including control software
• Print head/nozzle
• Suitable software for translating a 3D computer model into a machine program( slicing).
• Pump for conveying freshly mixed material continuously
• Sufficient length of pipe to connect the pump and print head
• Robot arm or gantry, including control software
• Print head/nozzle
• Suitable software for translating a 3D computer model into a machine program( slicing).
FUNDAMENTALS OF CERAMIC 3D PRINTING
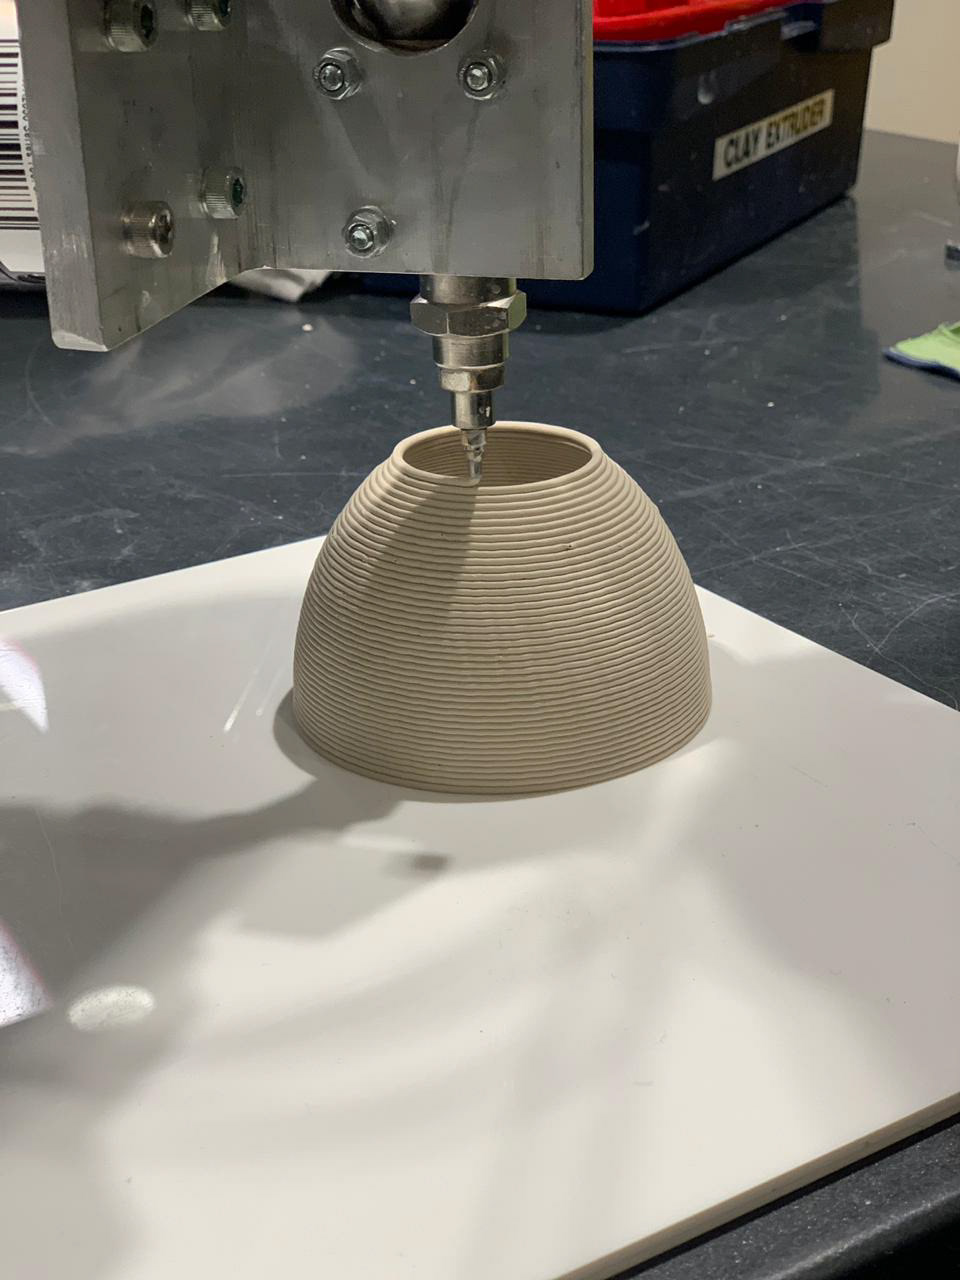
Fundamentals of 3D Printing in Clay: The goal is to construct a solid understanding of things to consider such as print speeds, print diameters, draft angles, non-linear printing, start-stop, etc.
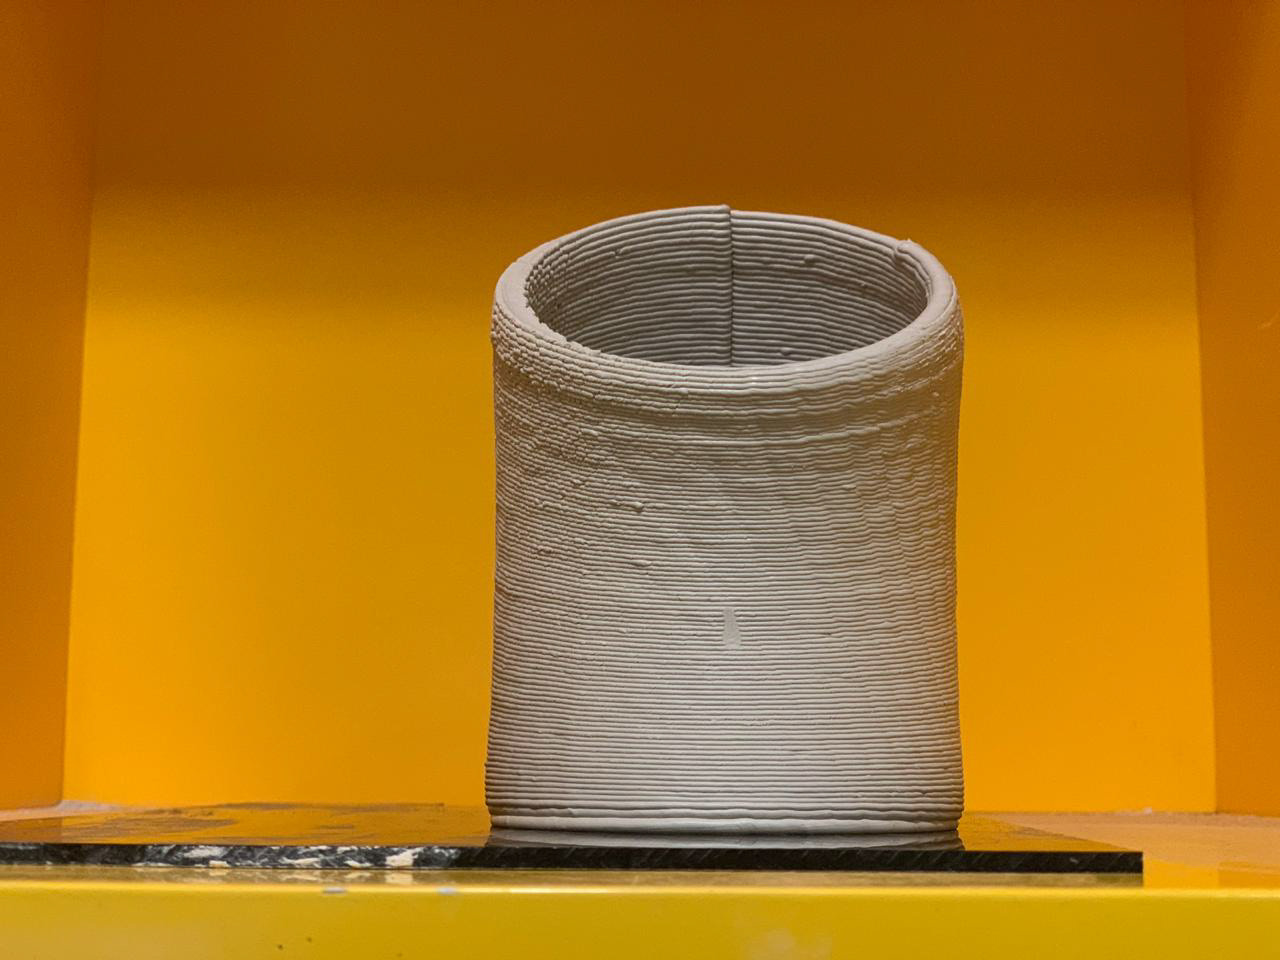
Experiment 101: Nozzle Size Vs Layer Height
A basic cylindric object is printed with varying nozzle sizes and layer heights. The attributes were then examined to have a better understanding of the ideal layer height versus nozzle size to achieve strength in each printed unit.
A basic cylindric object is printed with varying nozzle sizes and layer heights. The attributes were then examined to have a better understanding of the ideal layer height versus nozzle size to achieve strength in each printed unit.
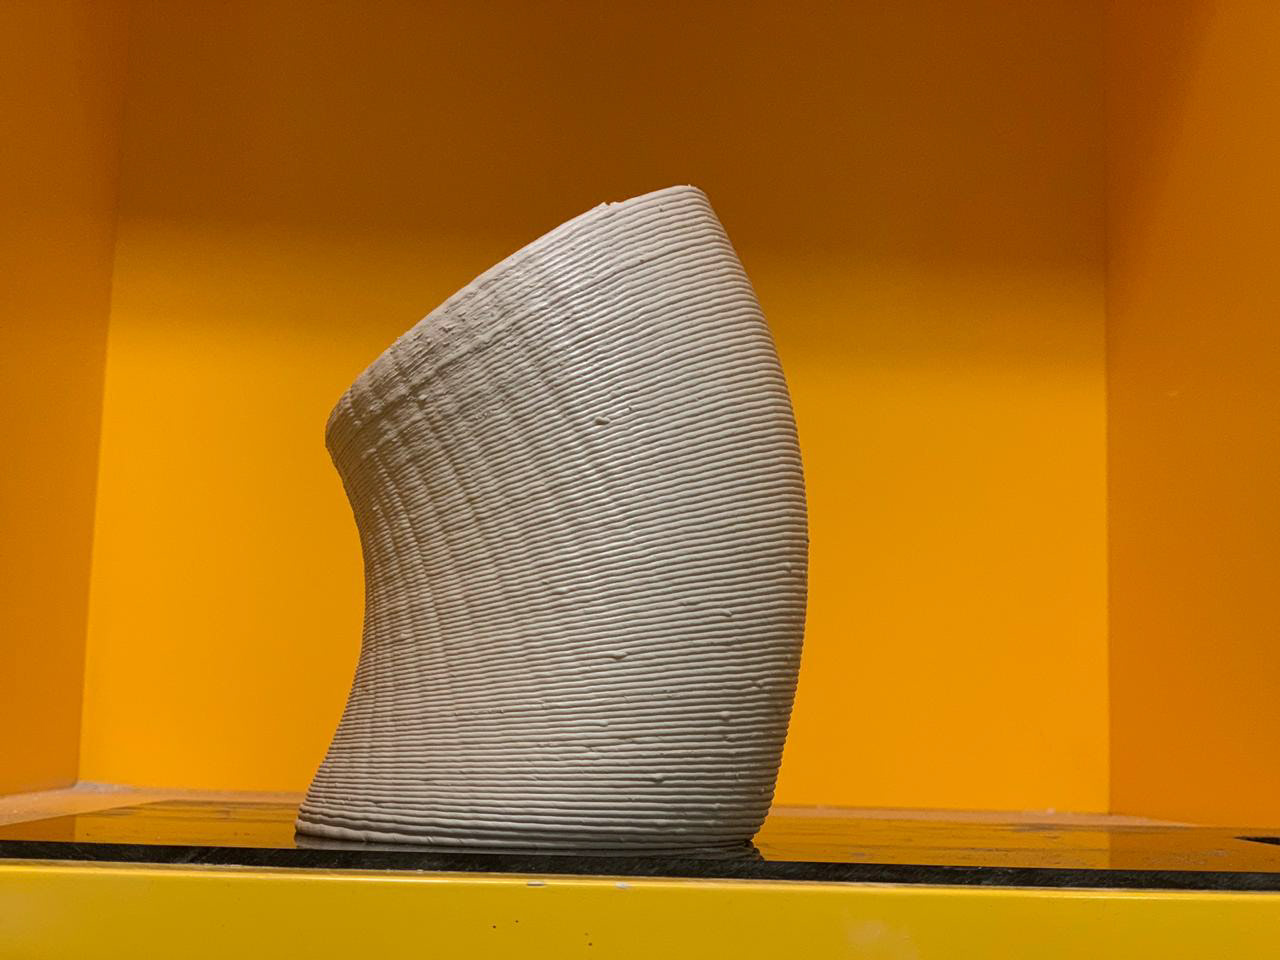
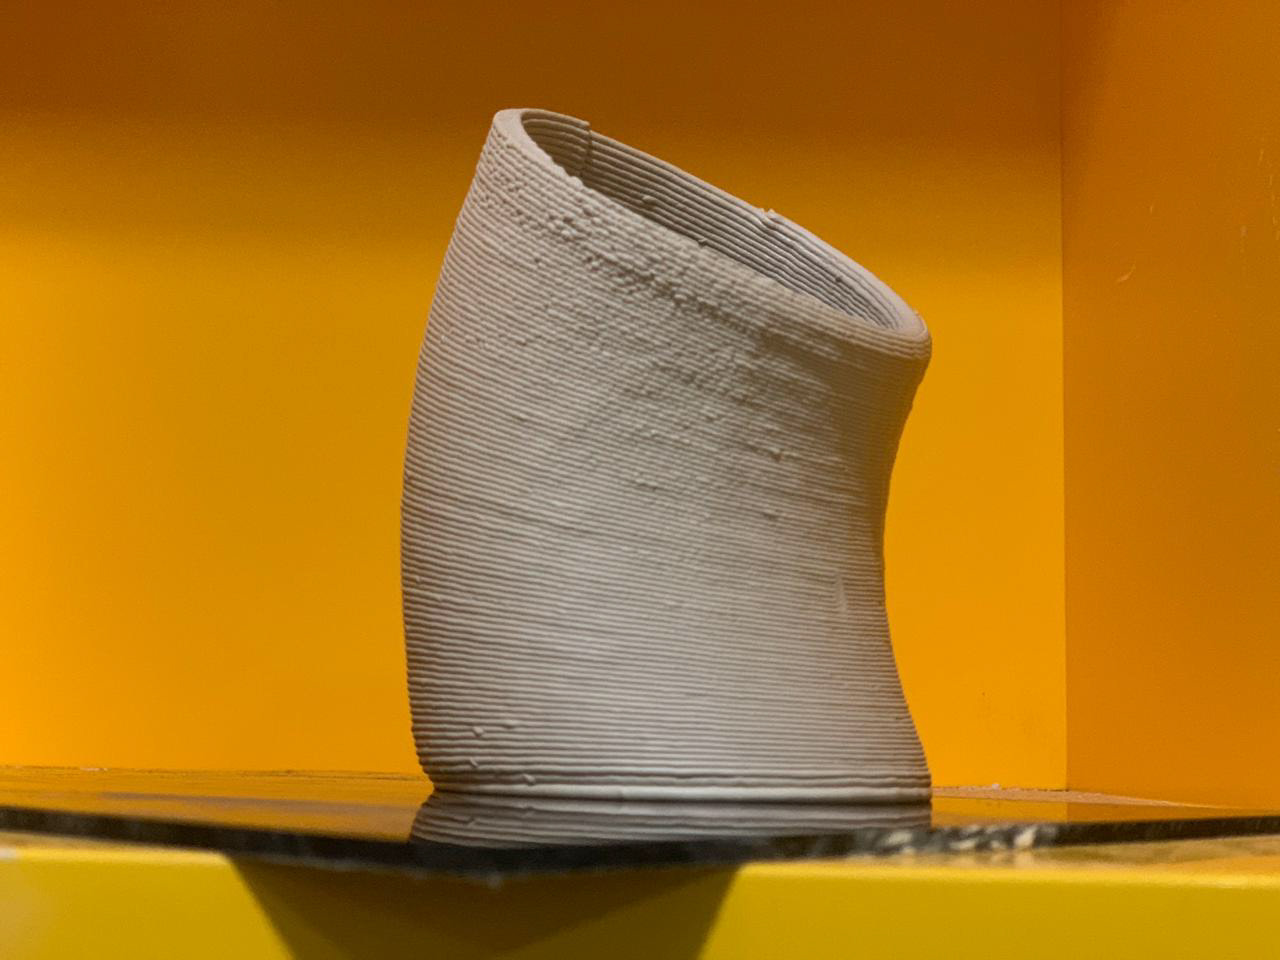
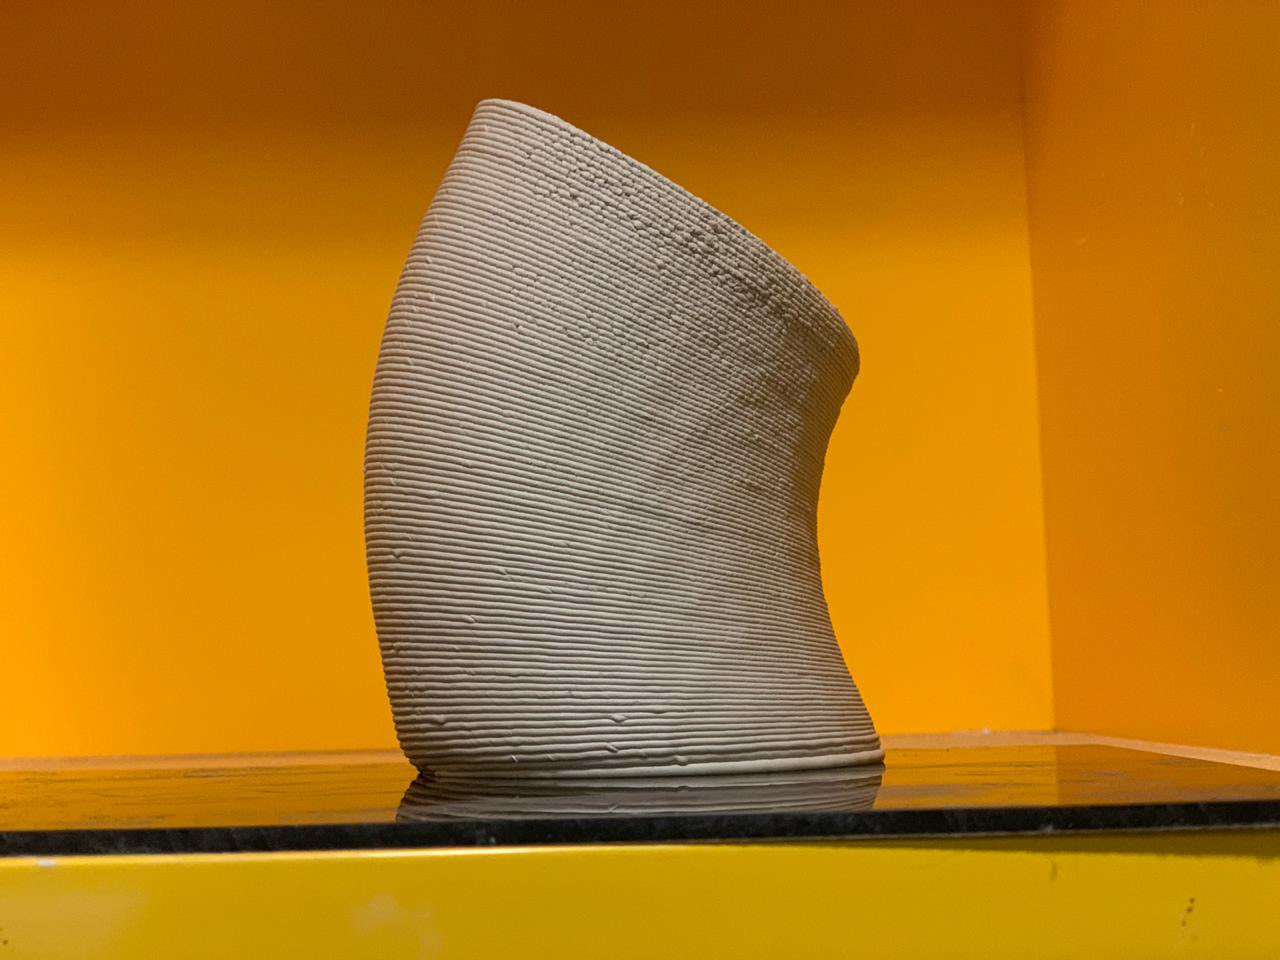
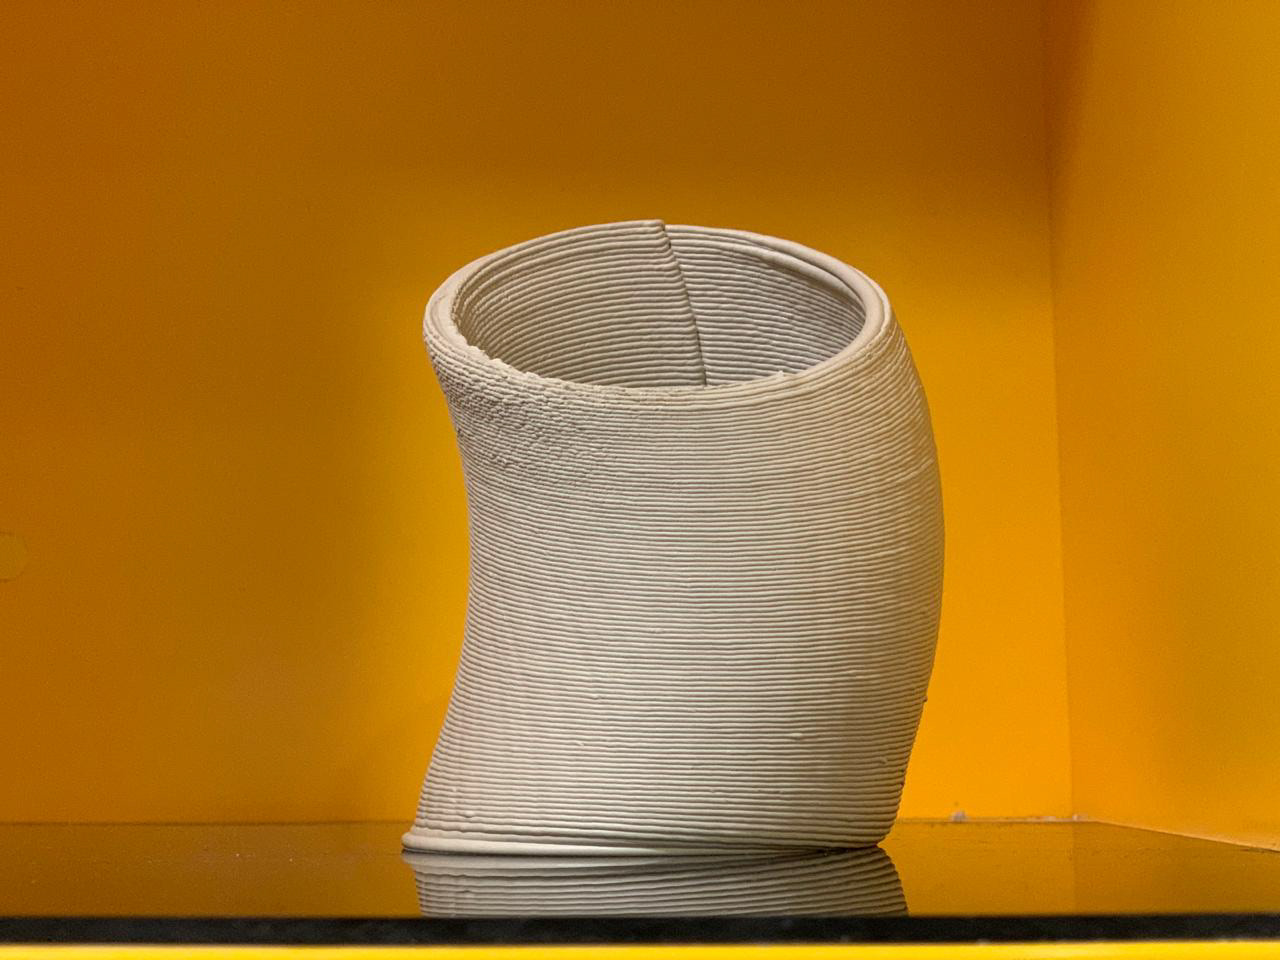
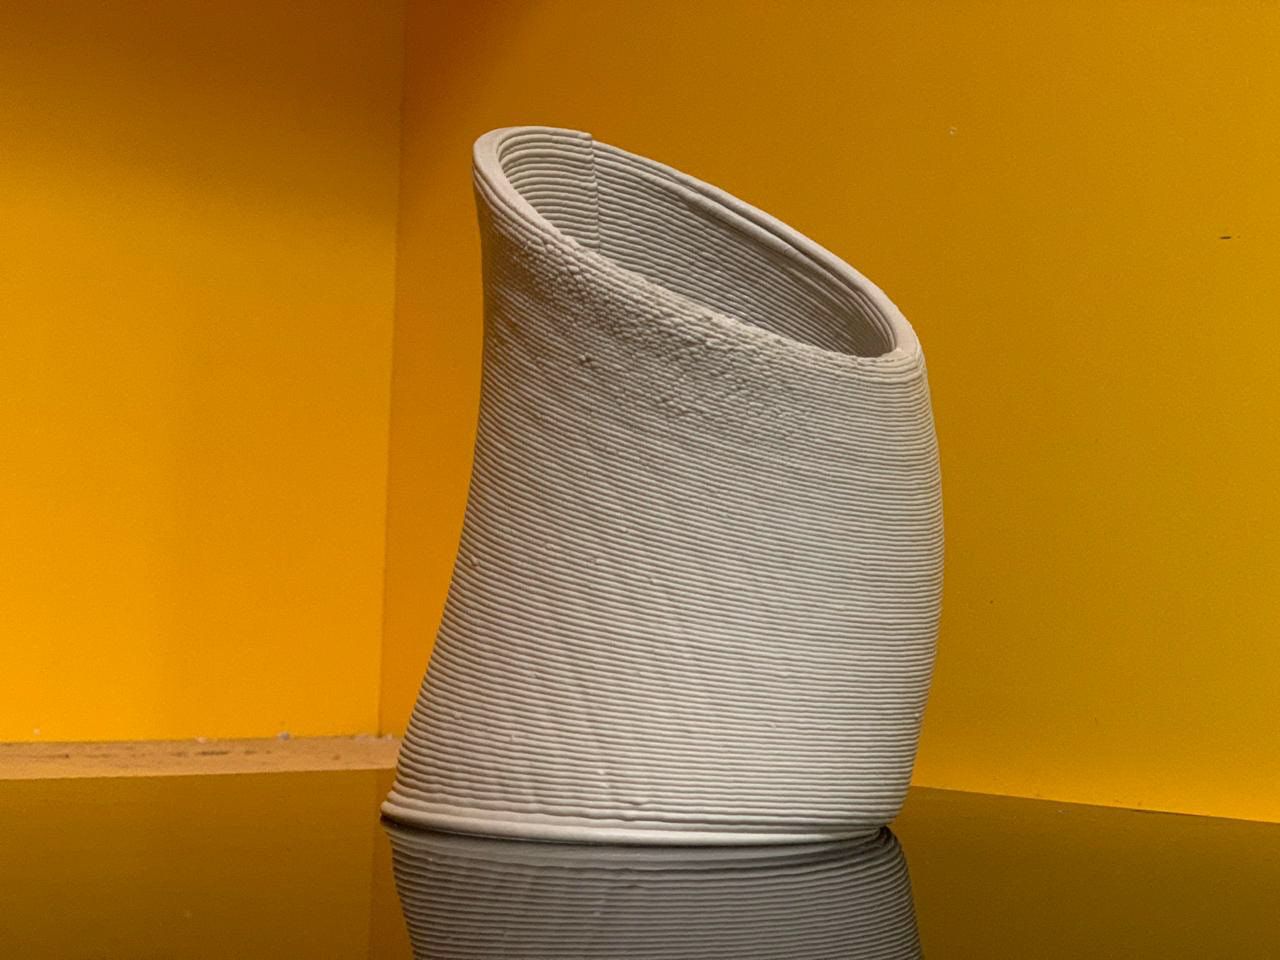
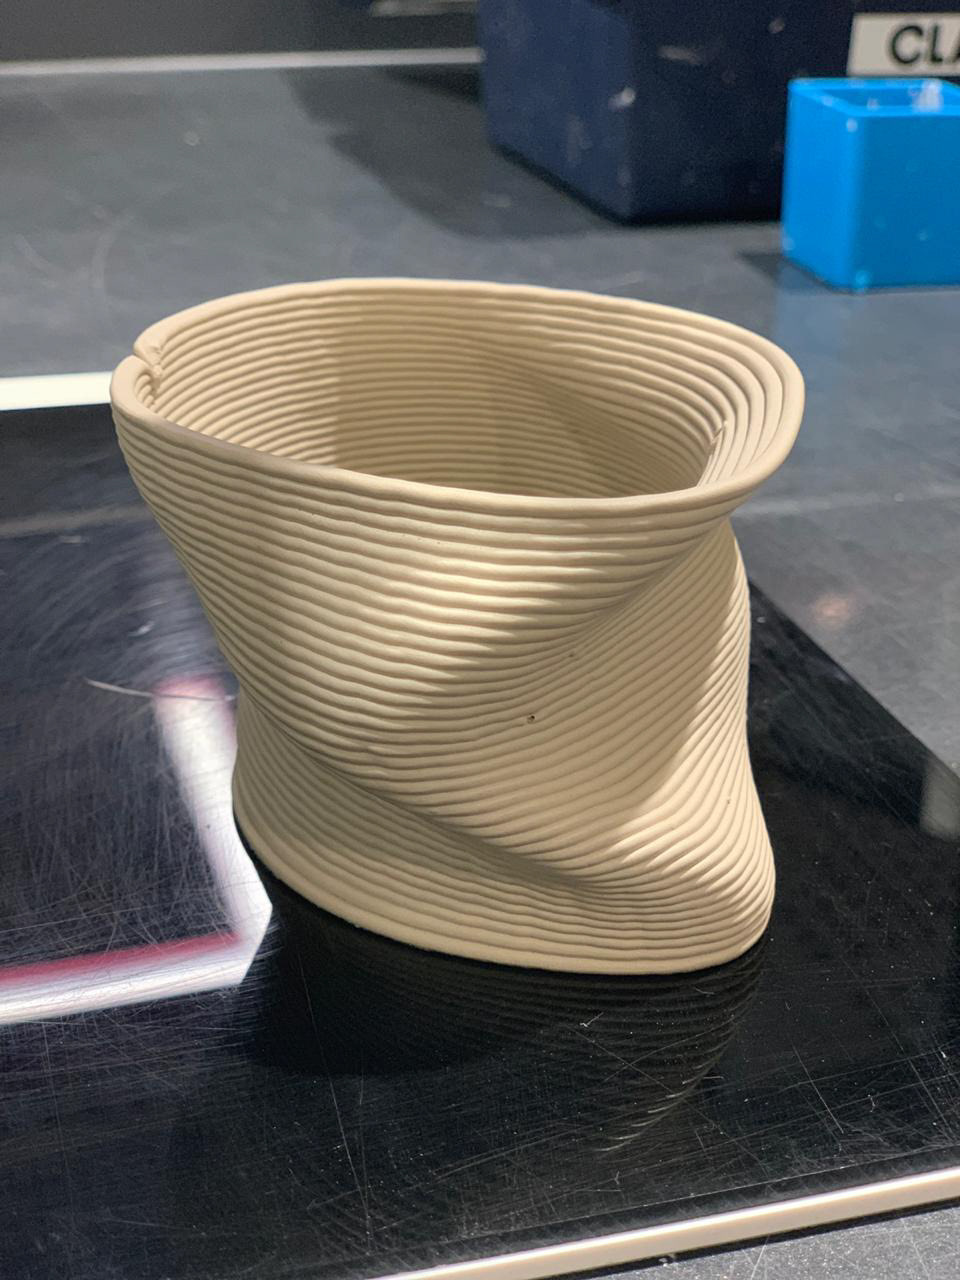
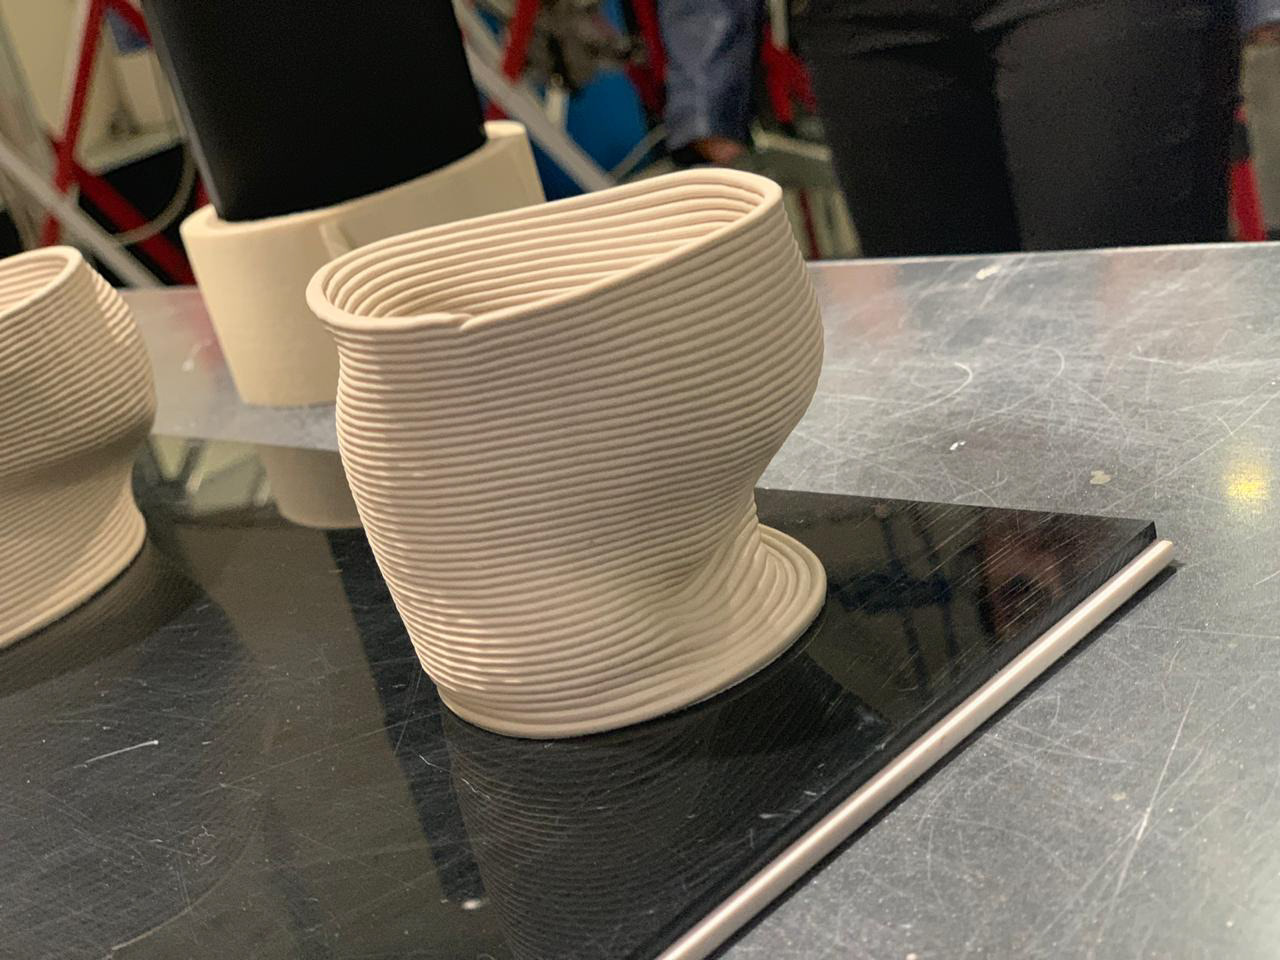
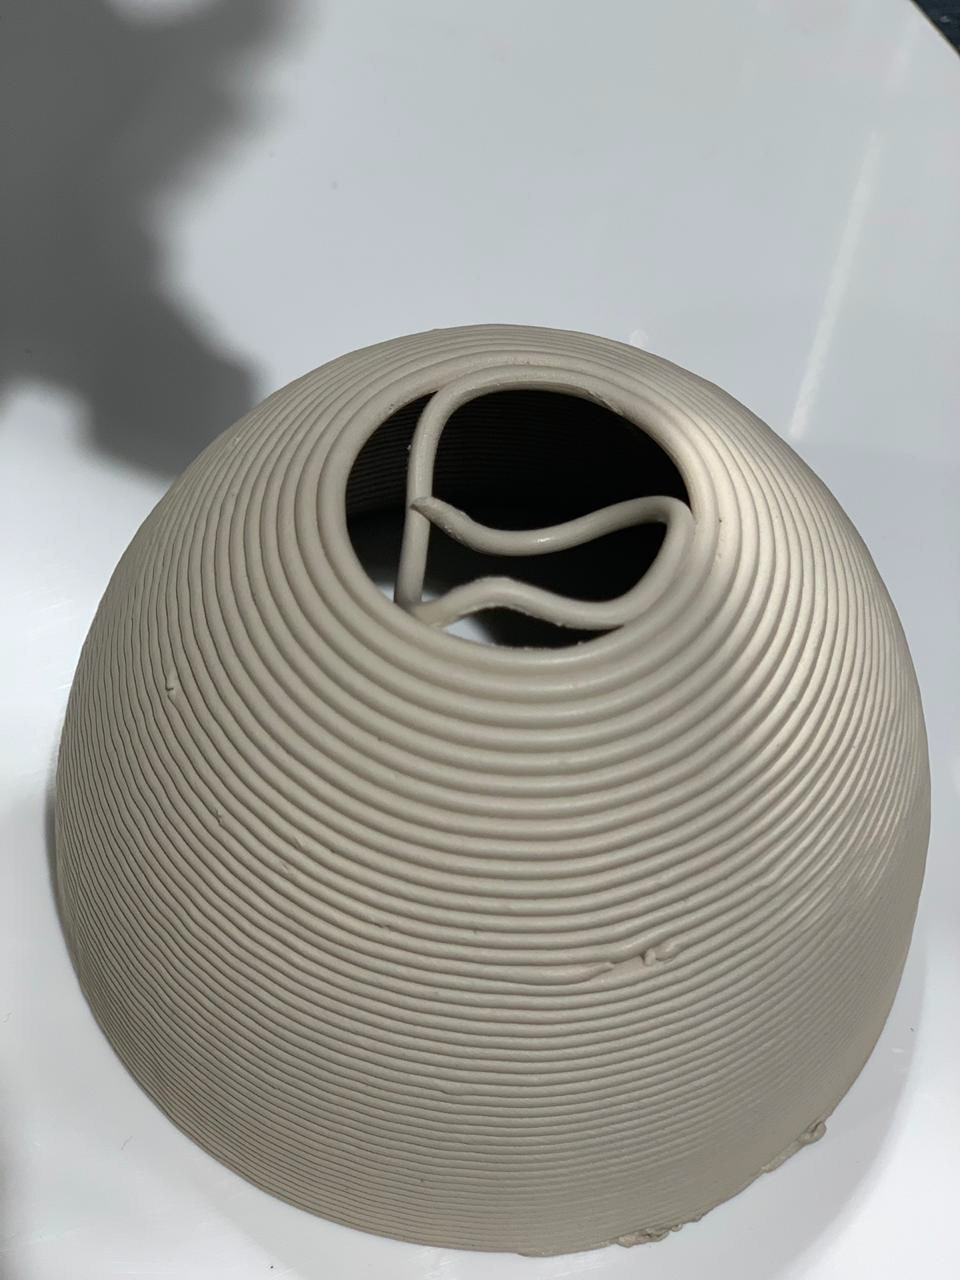
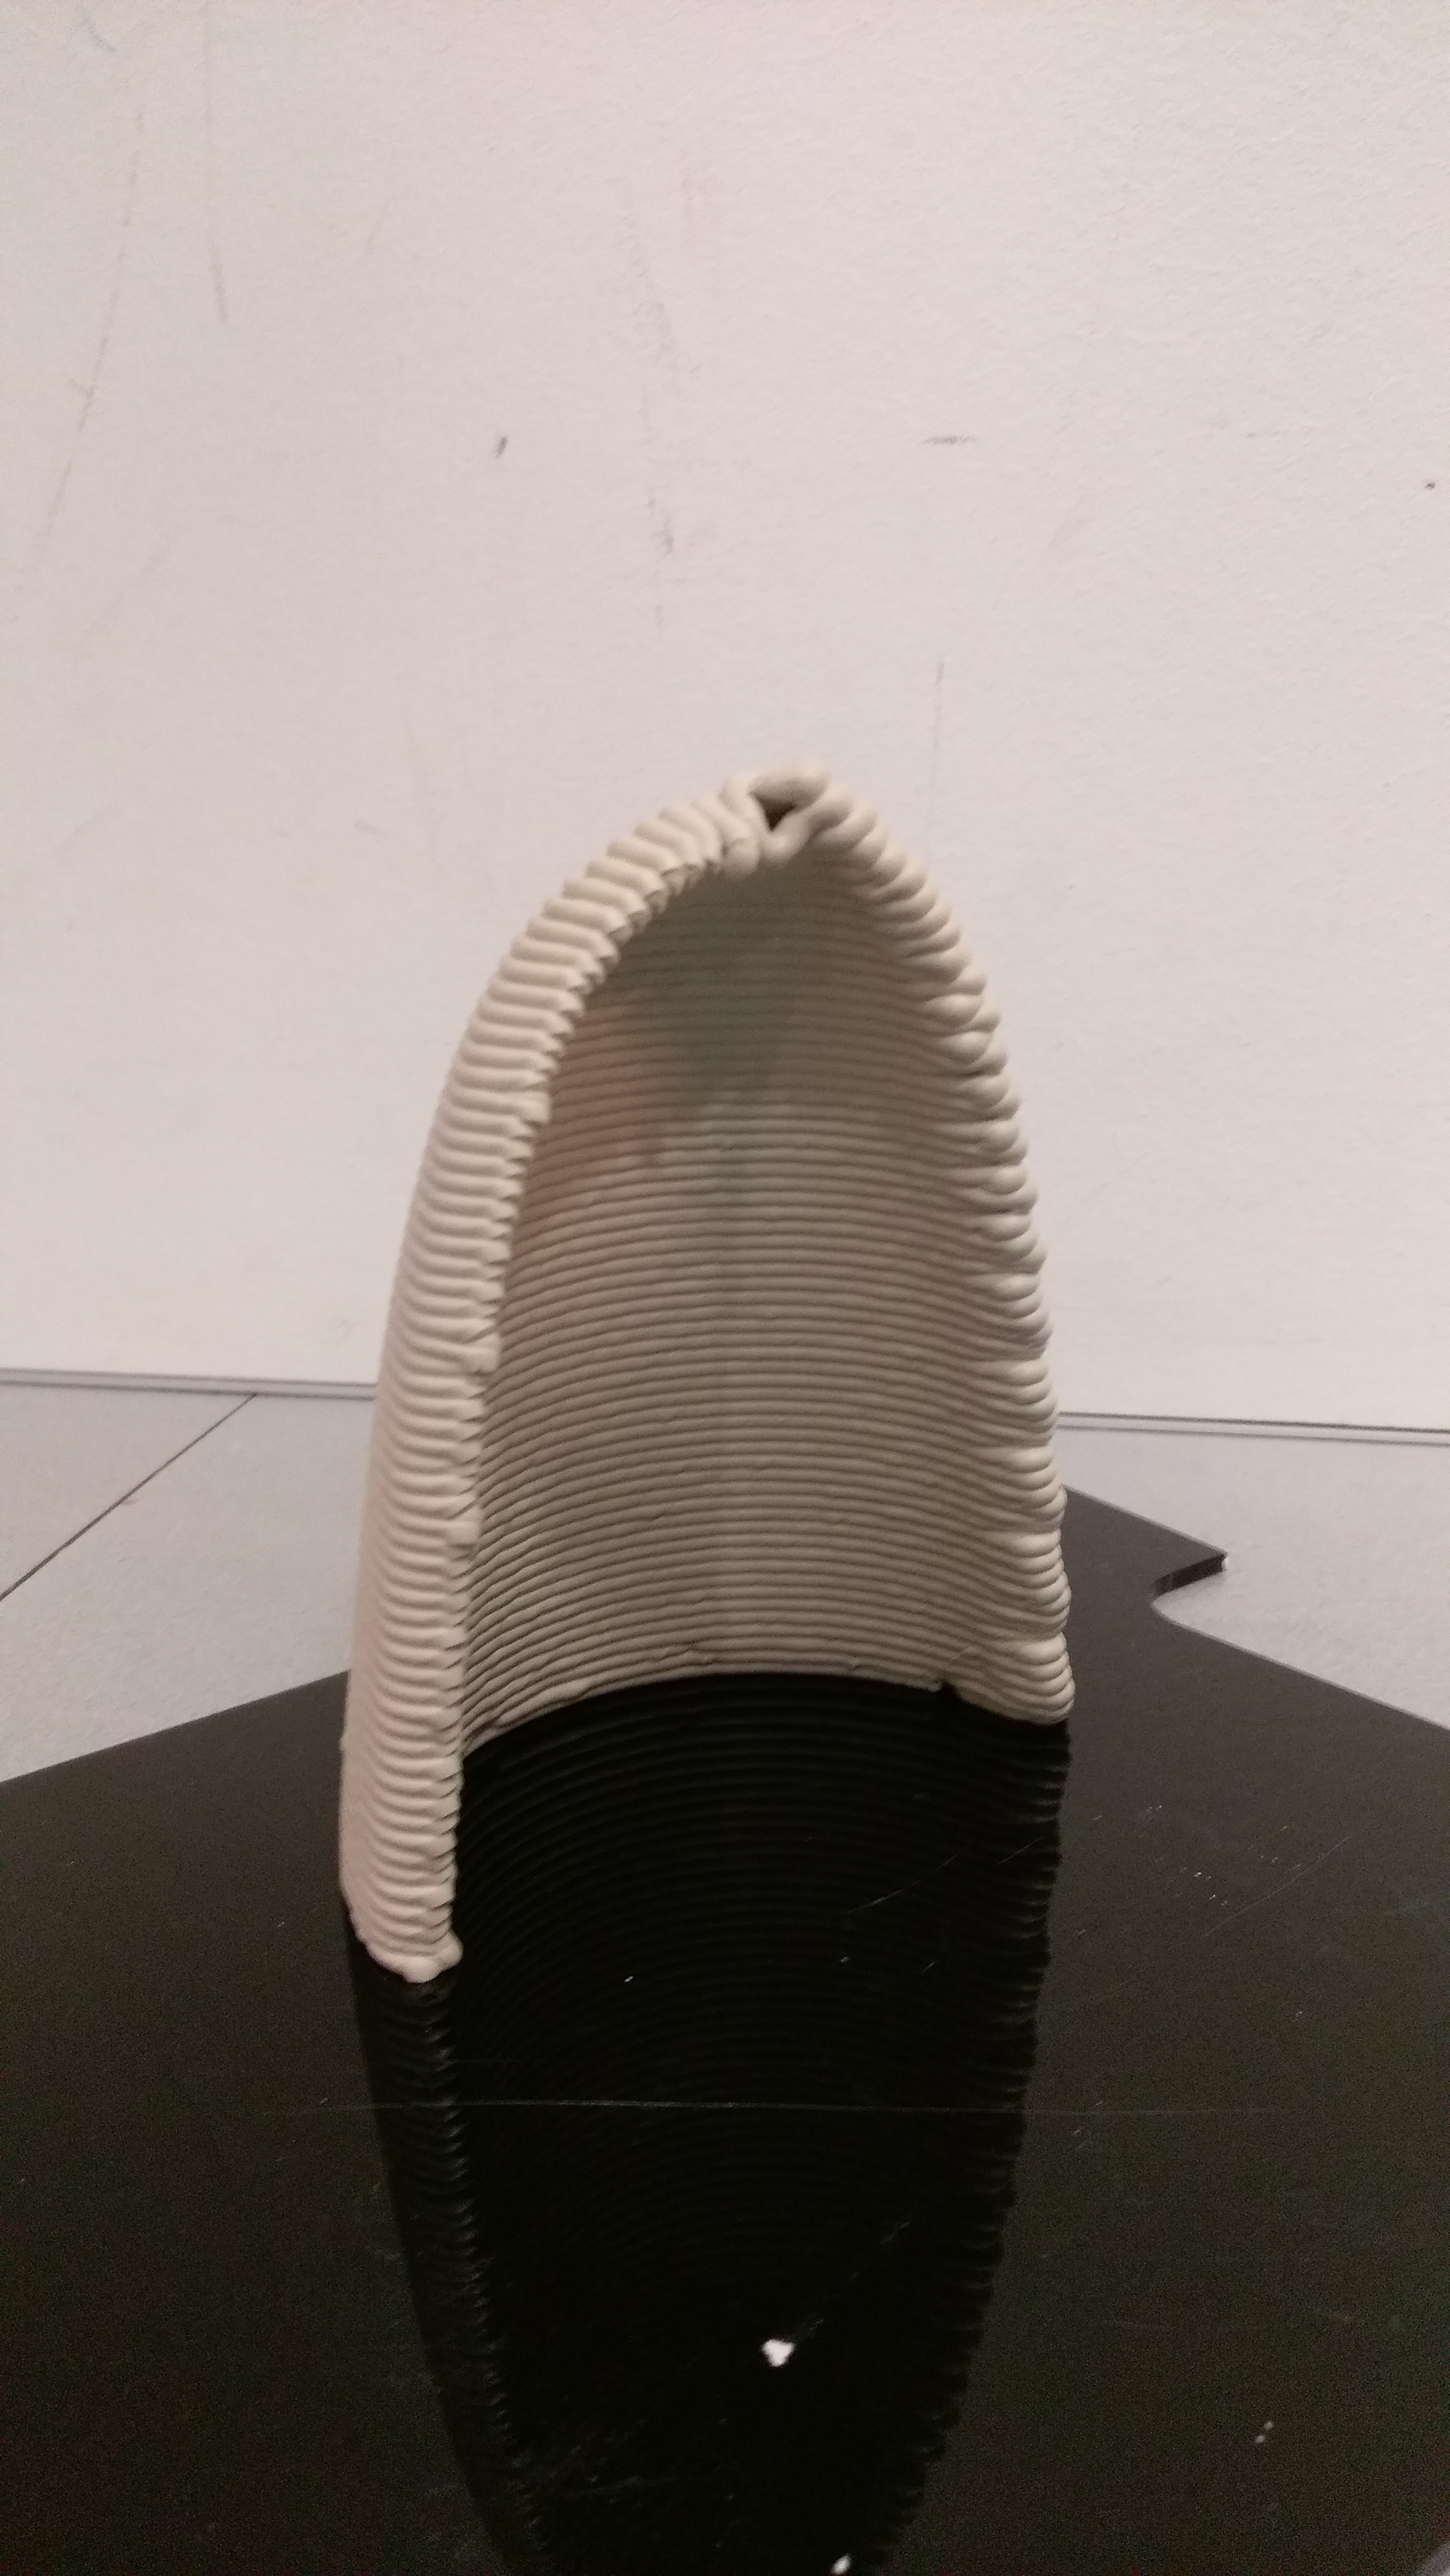
Experiment 102: Controlled Deflections
Experiments with basic cylindric geometries were carried out to explore the deflection angles and failures in order to test the limitations of draft angle and continuous toolpath printing. This was done on purpose in an attempt to discover beauty in flaws.
Experiments with basic cylindric geometries were carried out to explore the deflection angles and failures in order to test the limitations of draft angle and continuous toolpath printing. This was done on purpose in an attempt to discover beauty in flaws.
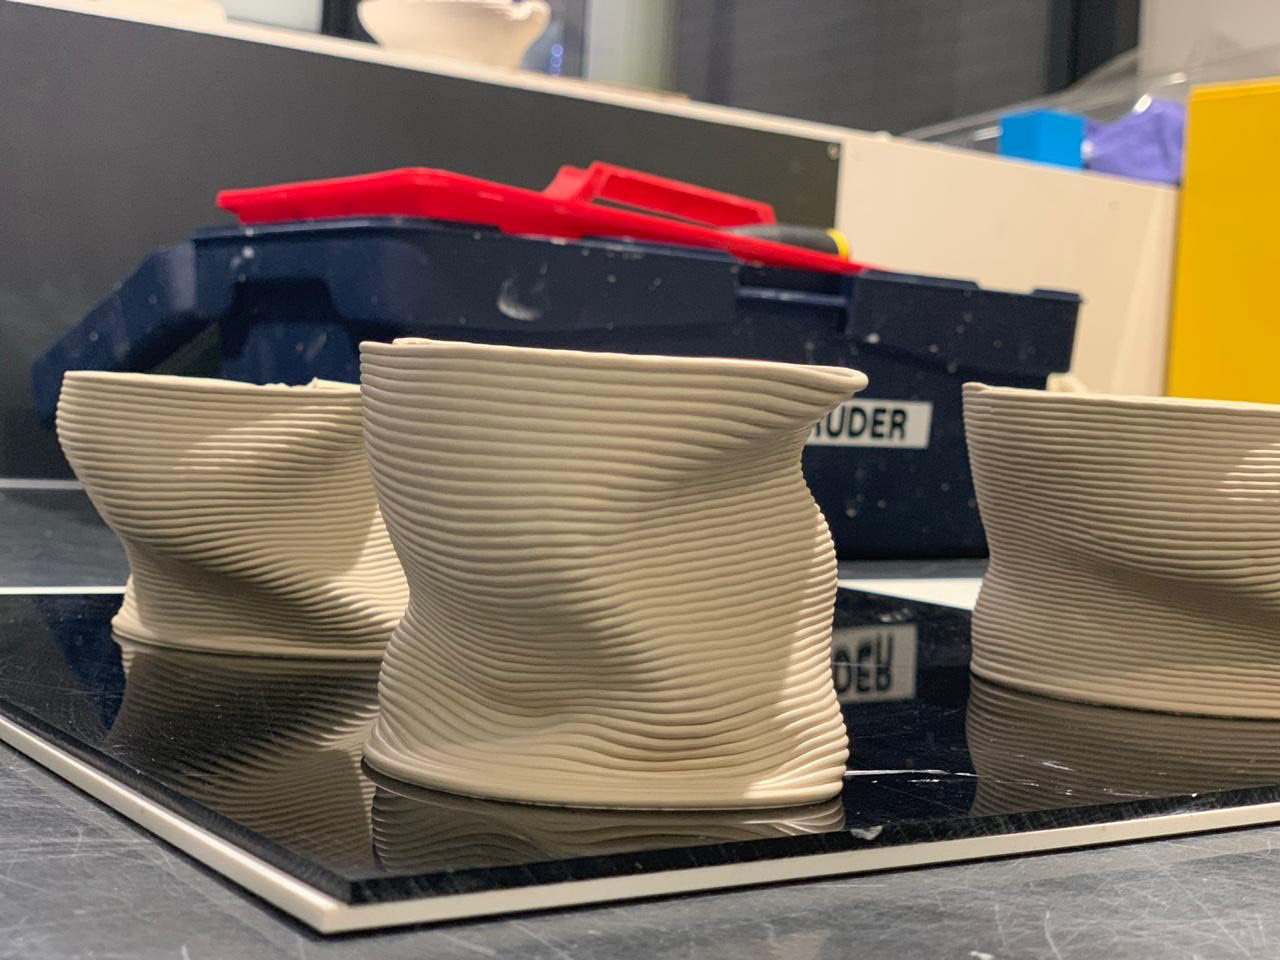
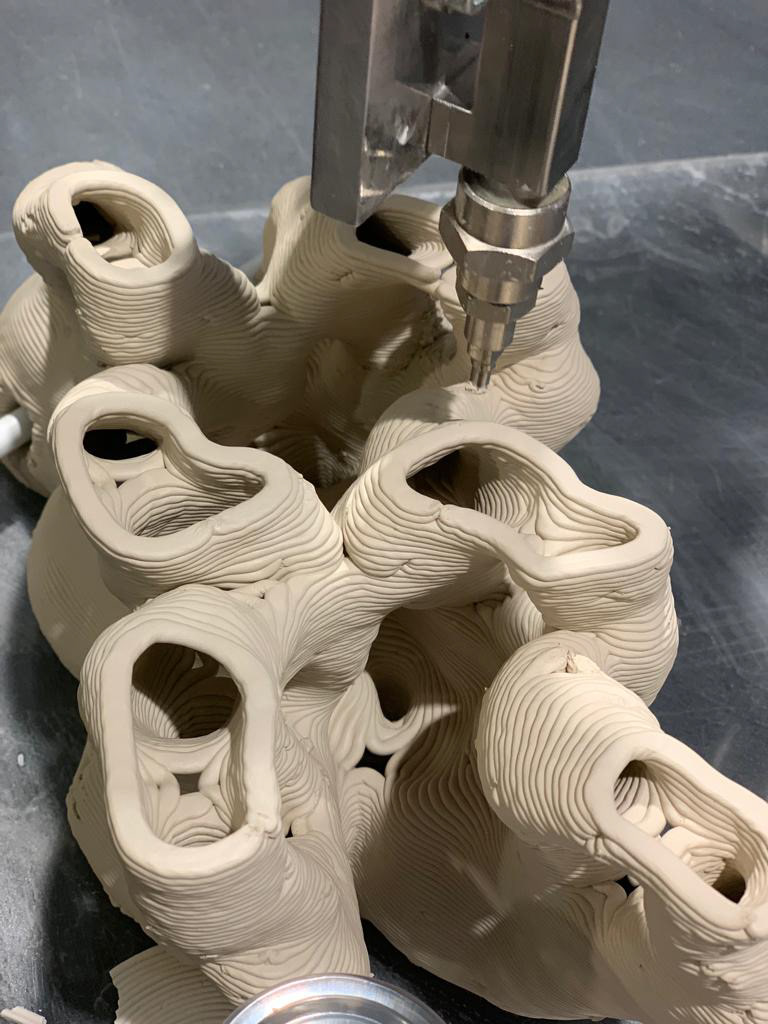
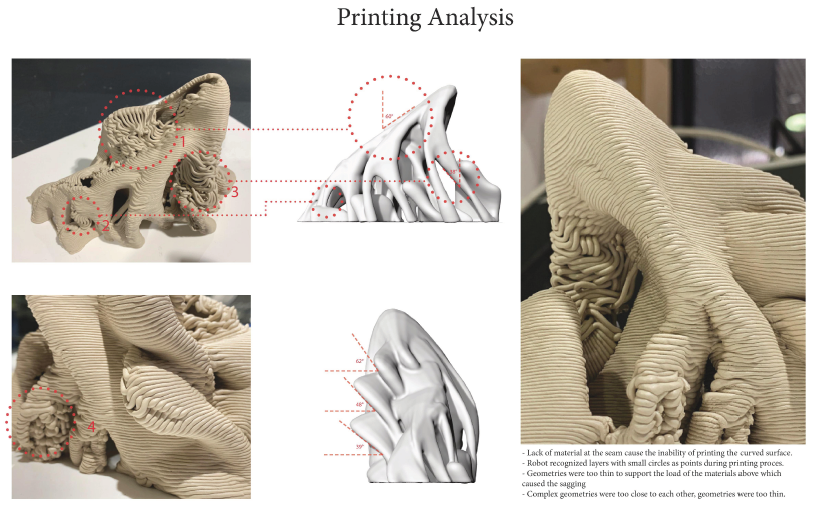
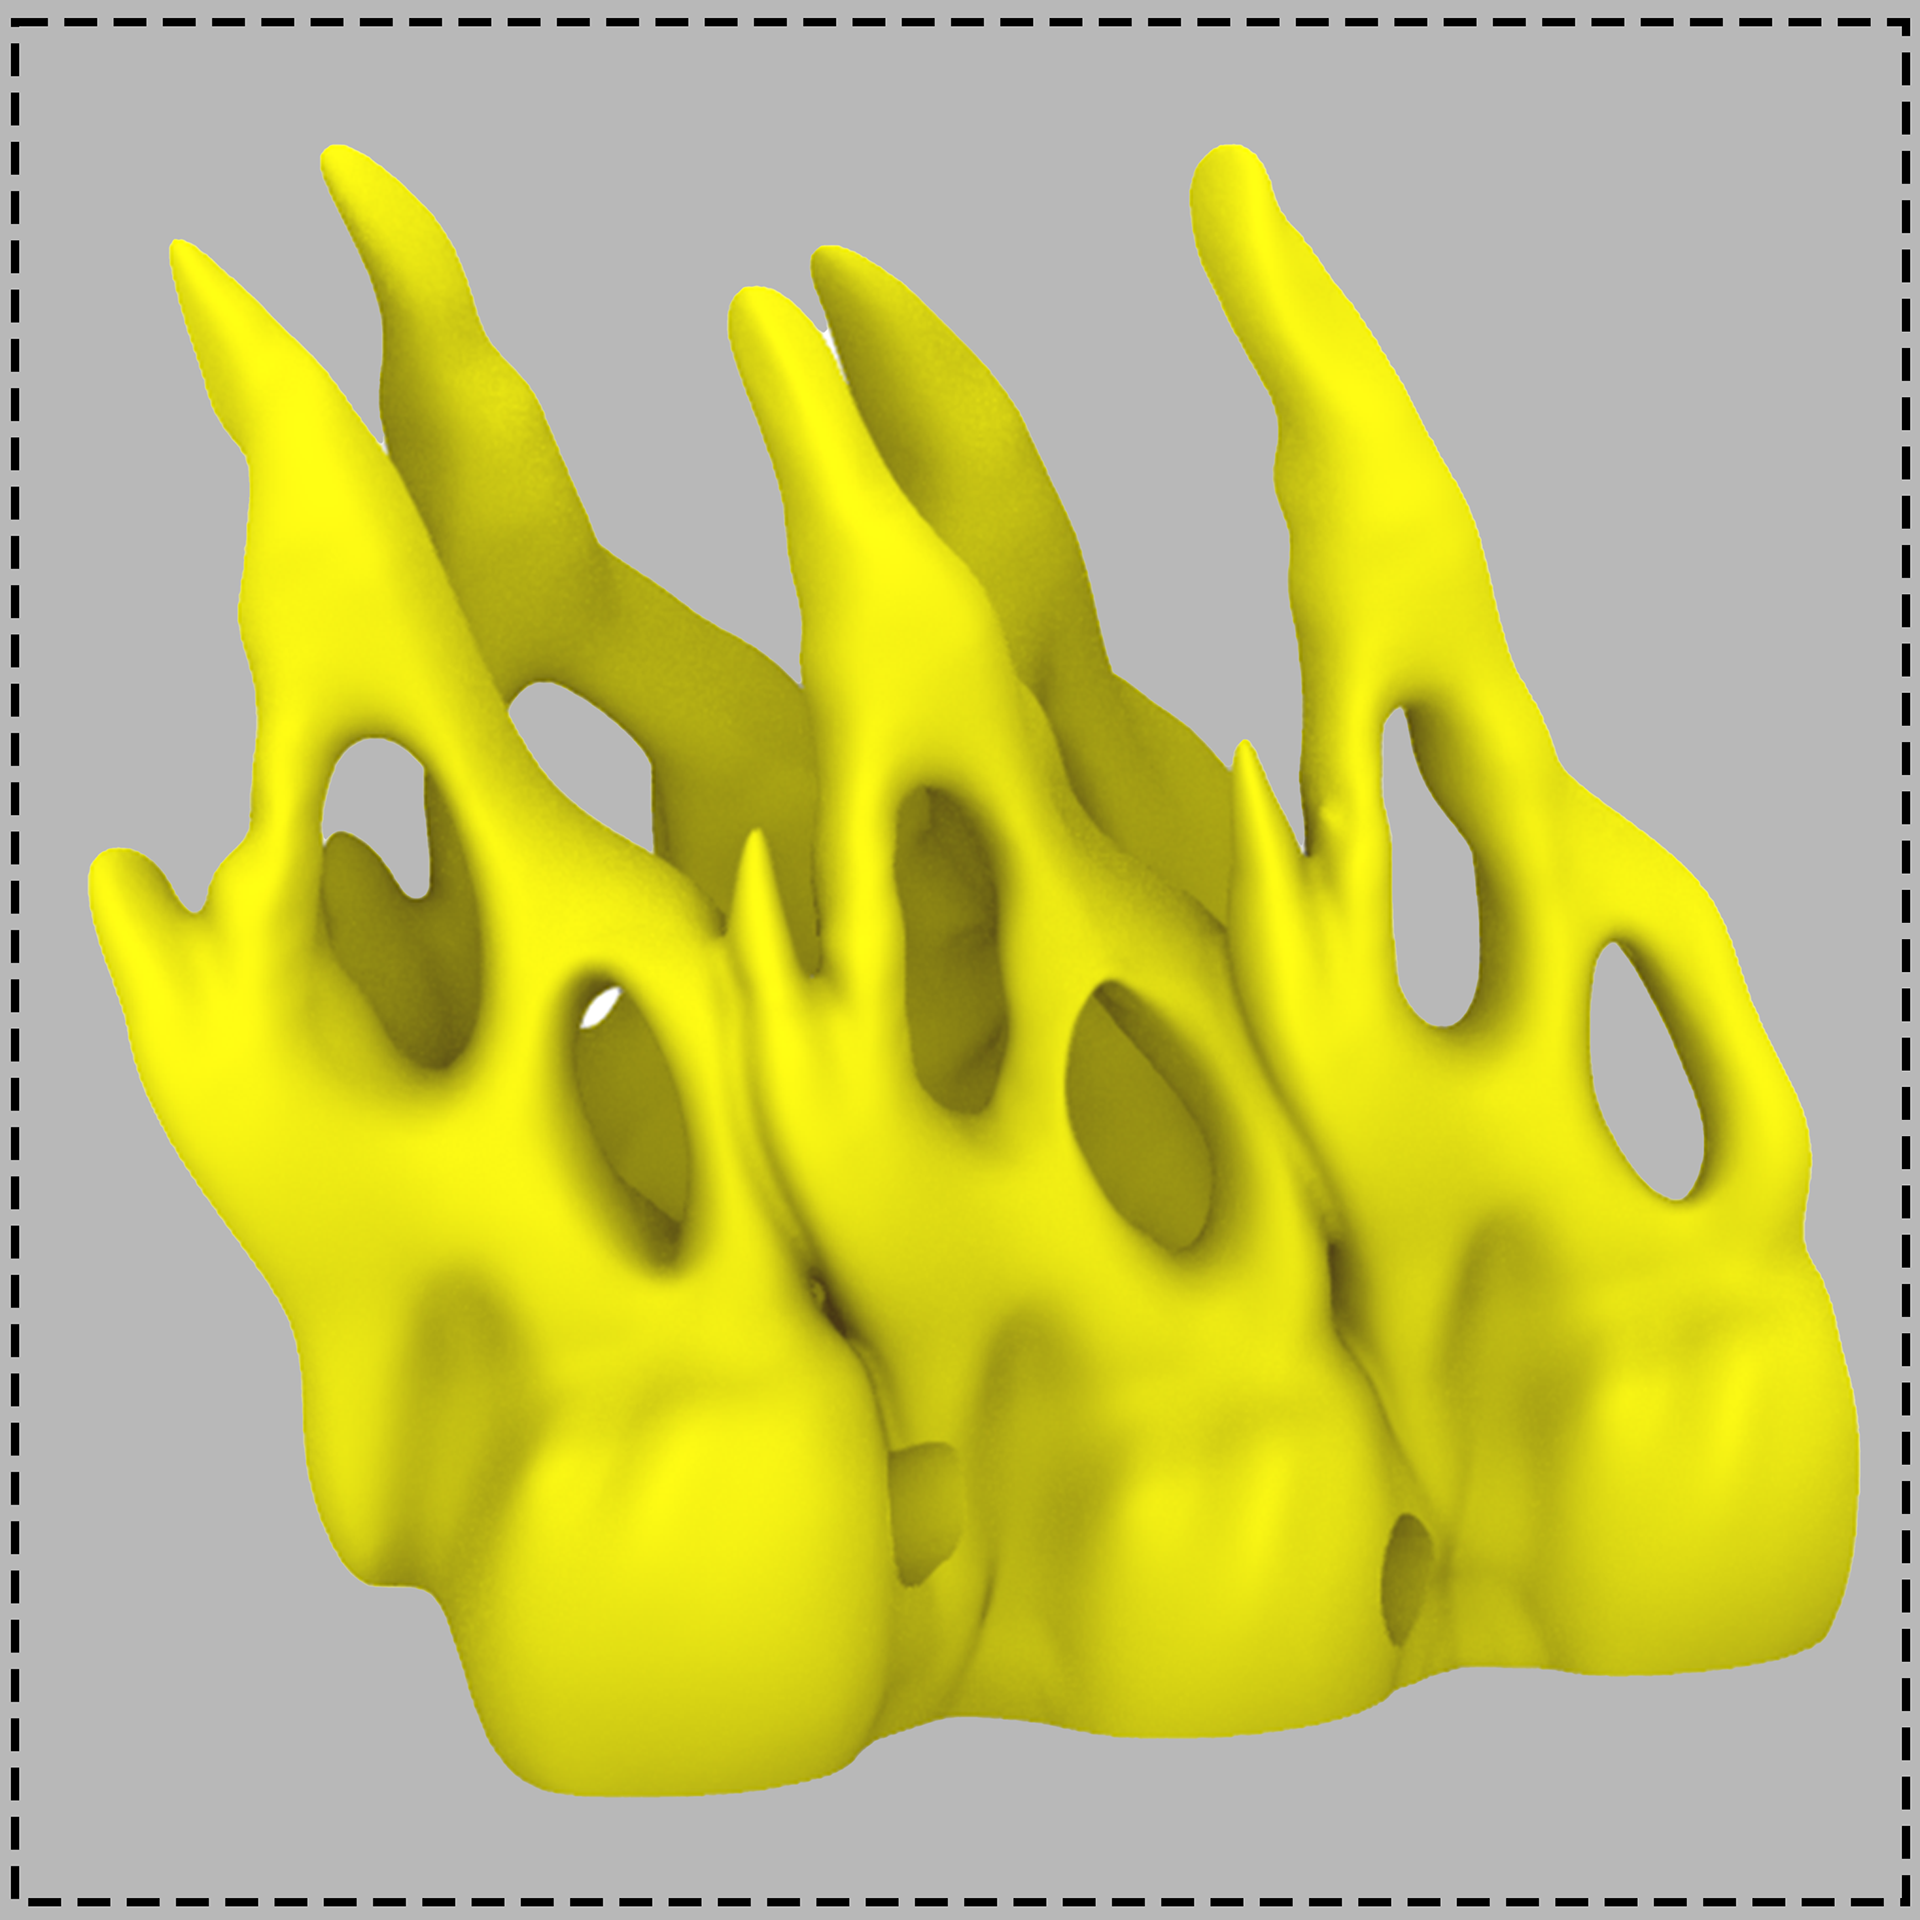
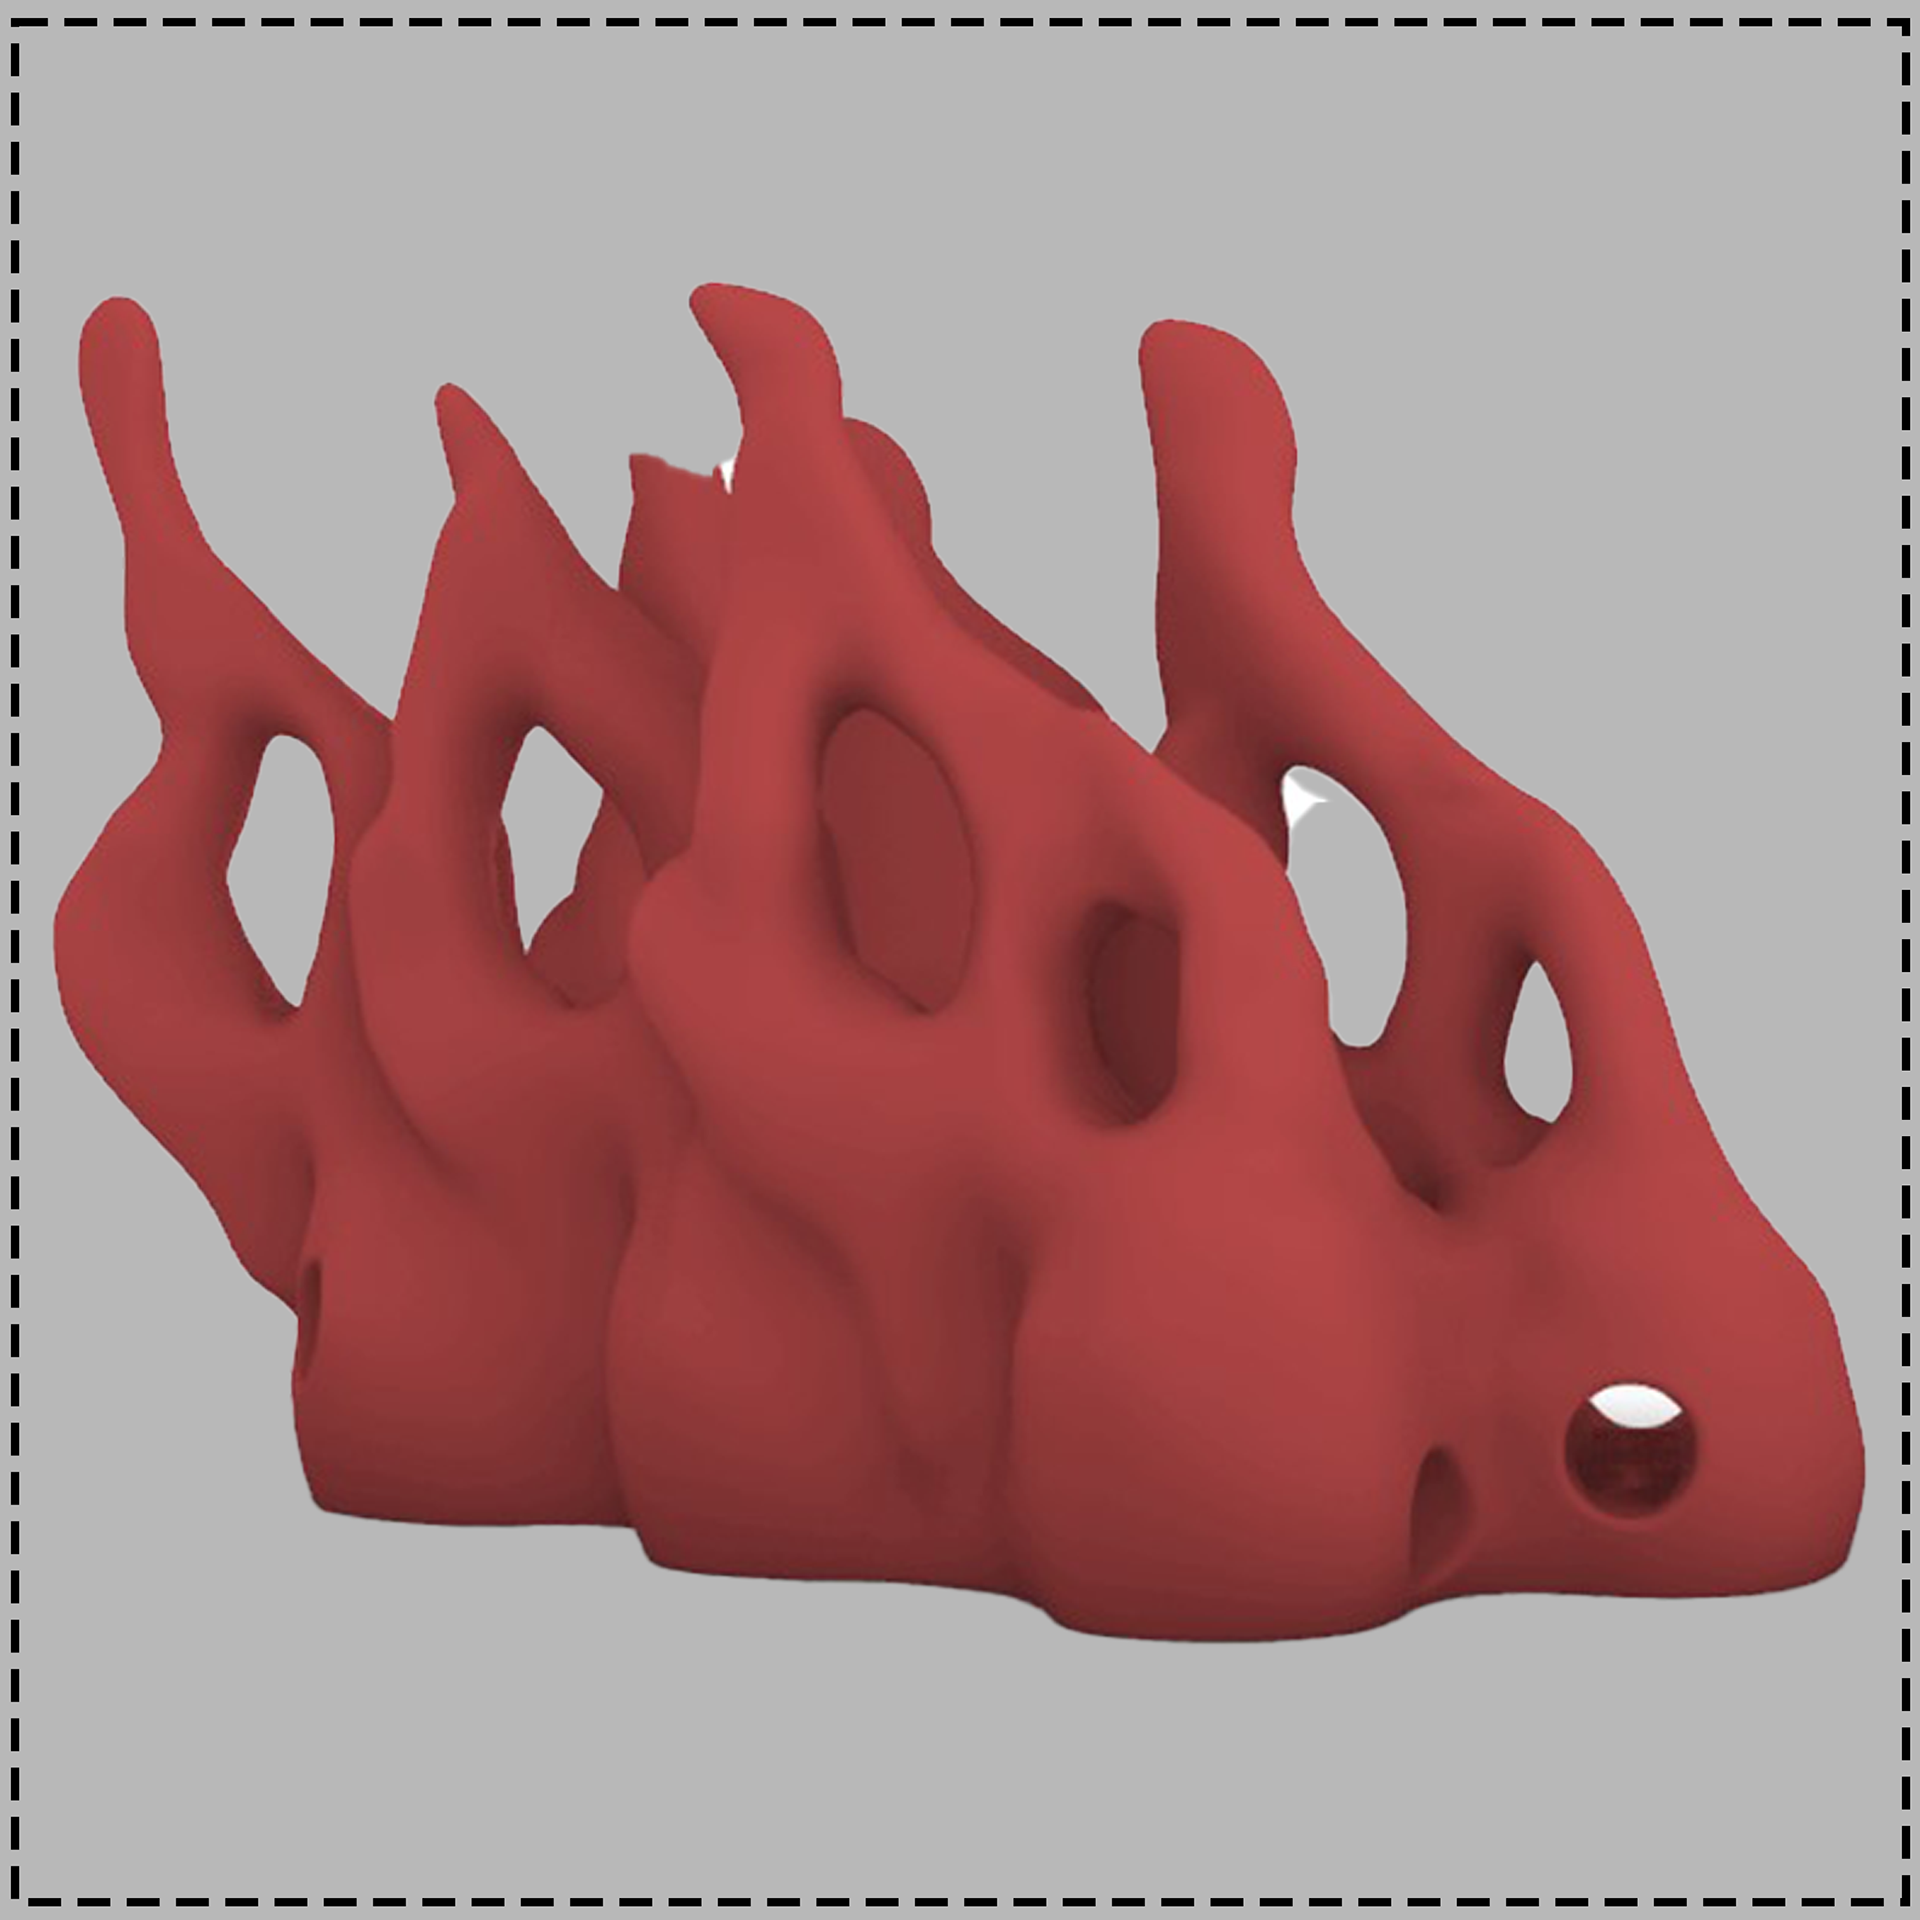
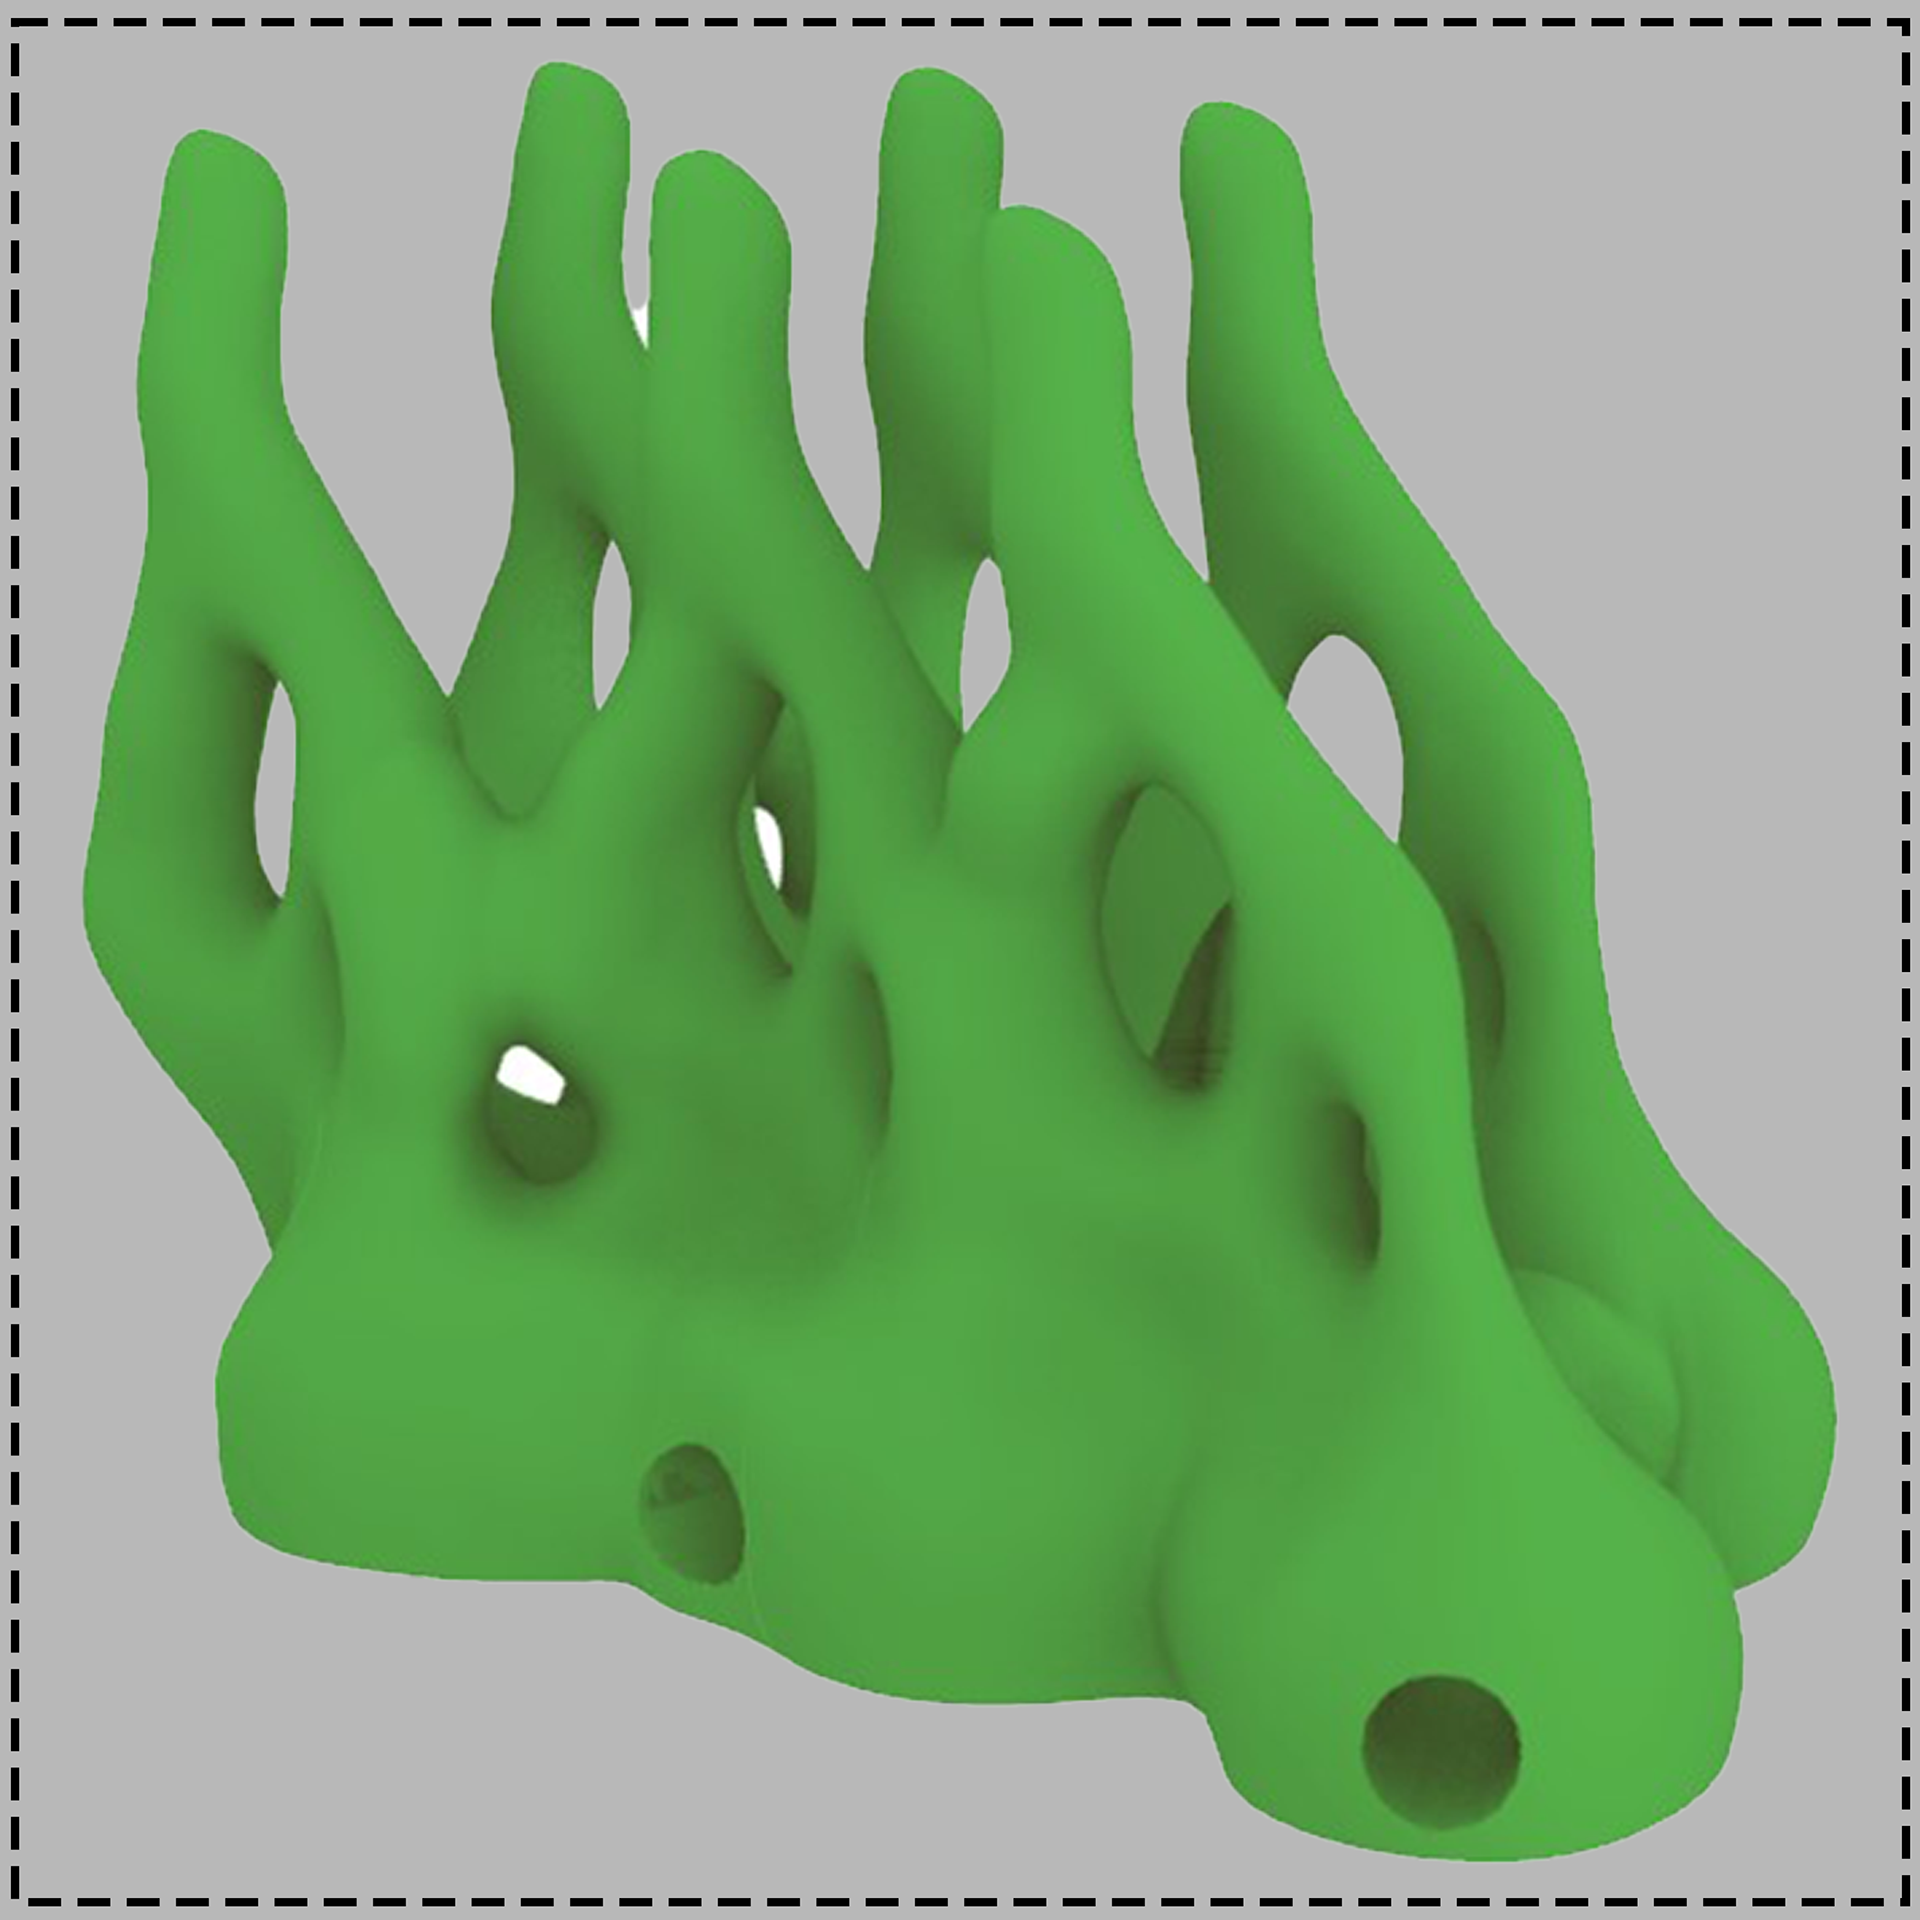
Experiment 103: Complex Geometries
A series of tests were carried out to examine and analyze the behavior of ceramic 3d printing when complicated geometries were constructed, employing knowledge of nozzle diameters, layer heights, toolpath, and draught angle deflections. The experiments were parametrized to investigate print sizes, deflection failures, and the amount of complexities that toolpath changes may generate.
A series of tests were carried out to examine and analyze the behavior of ceramic 3d printing when complicated geometries were constructed, employing knowledge of nozzle diameters, layer heights, toolpath, and draught angle deflections. The experiments were parametrized to investigate print sizes, deflection failures, and the amount of complexities that toolpath changes may generate.


APPLICATION IN ARCHITECTURE
A 3D-Printed Masonry Wall
Step #1: Creating a Digital model
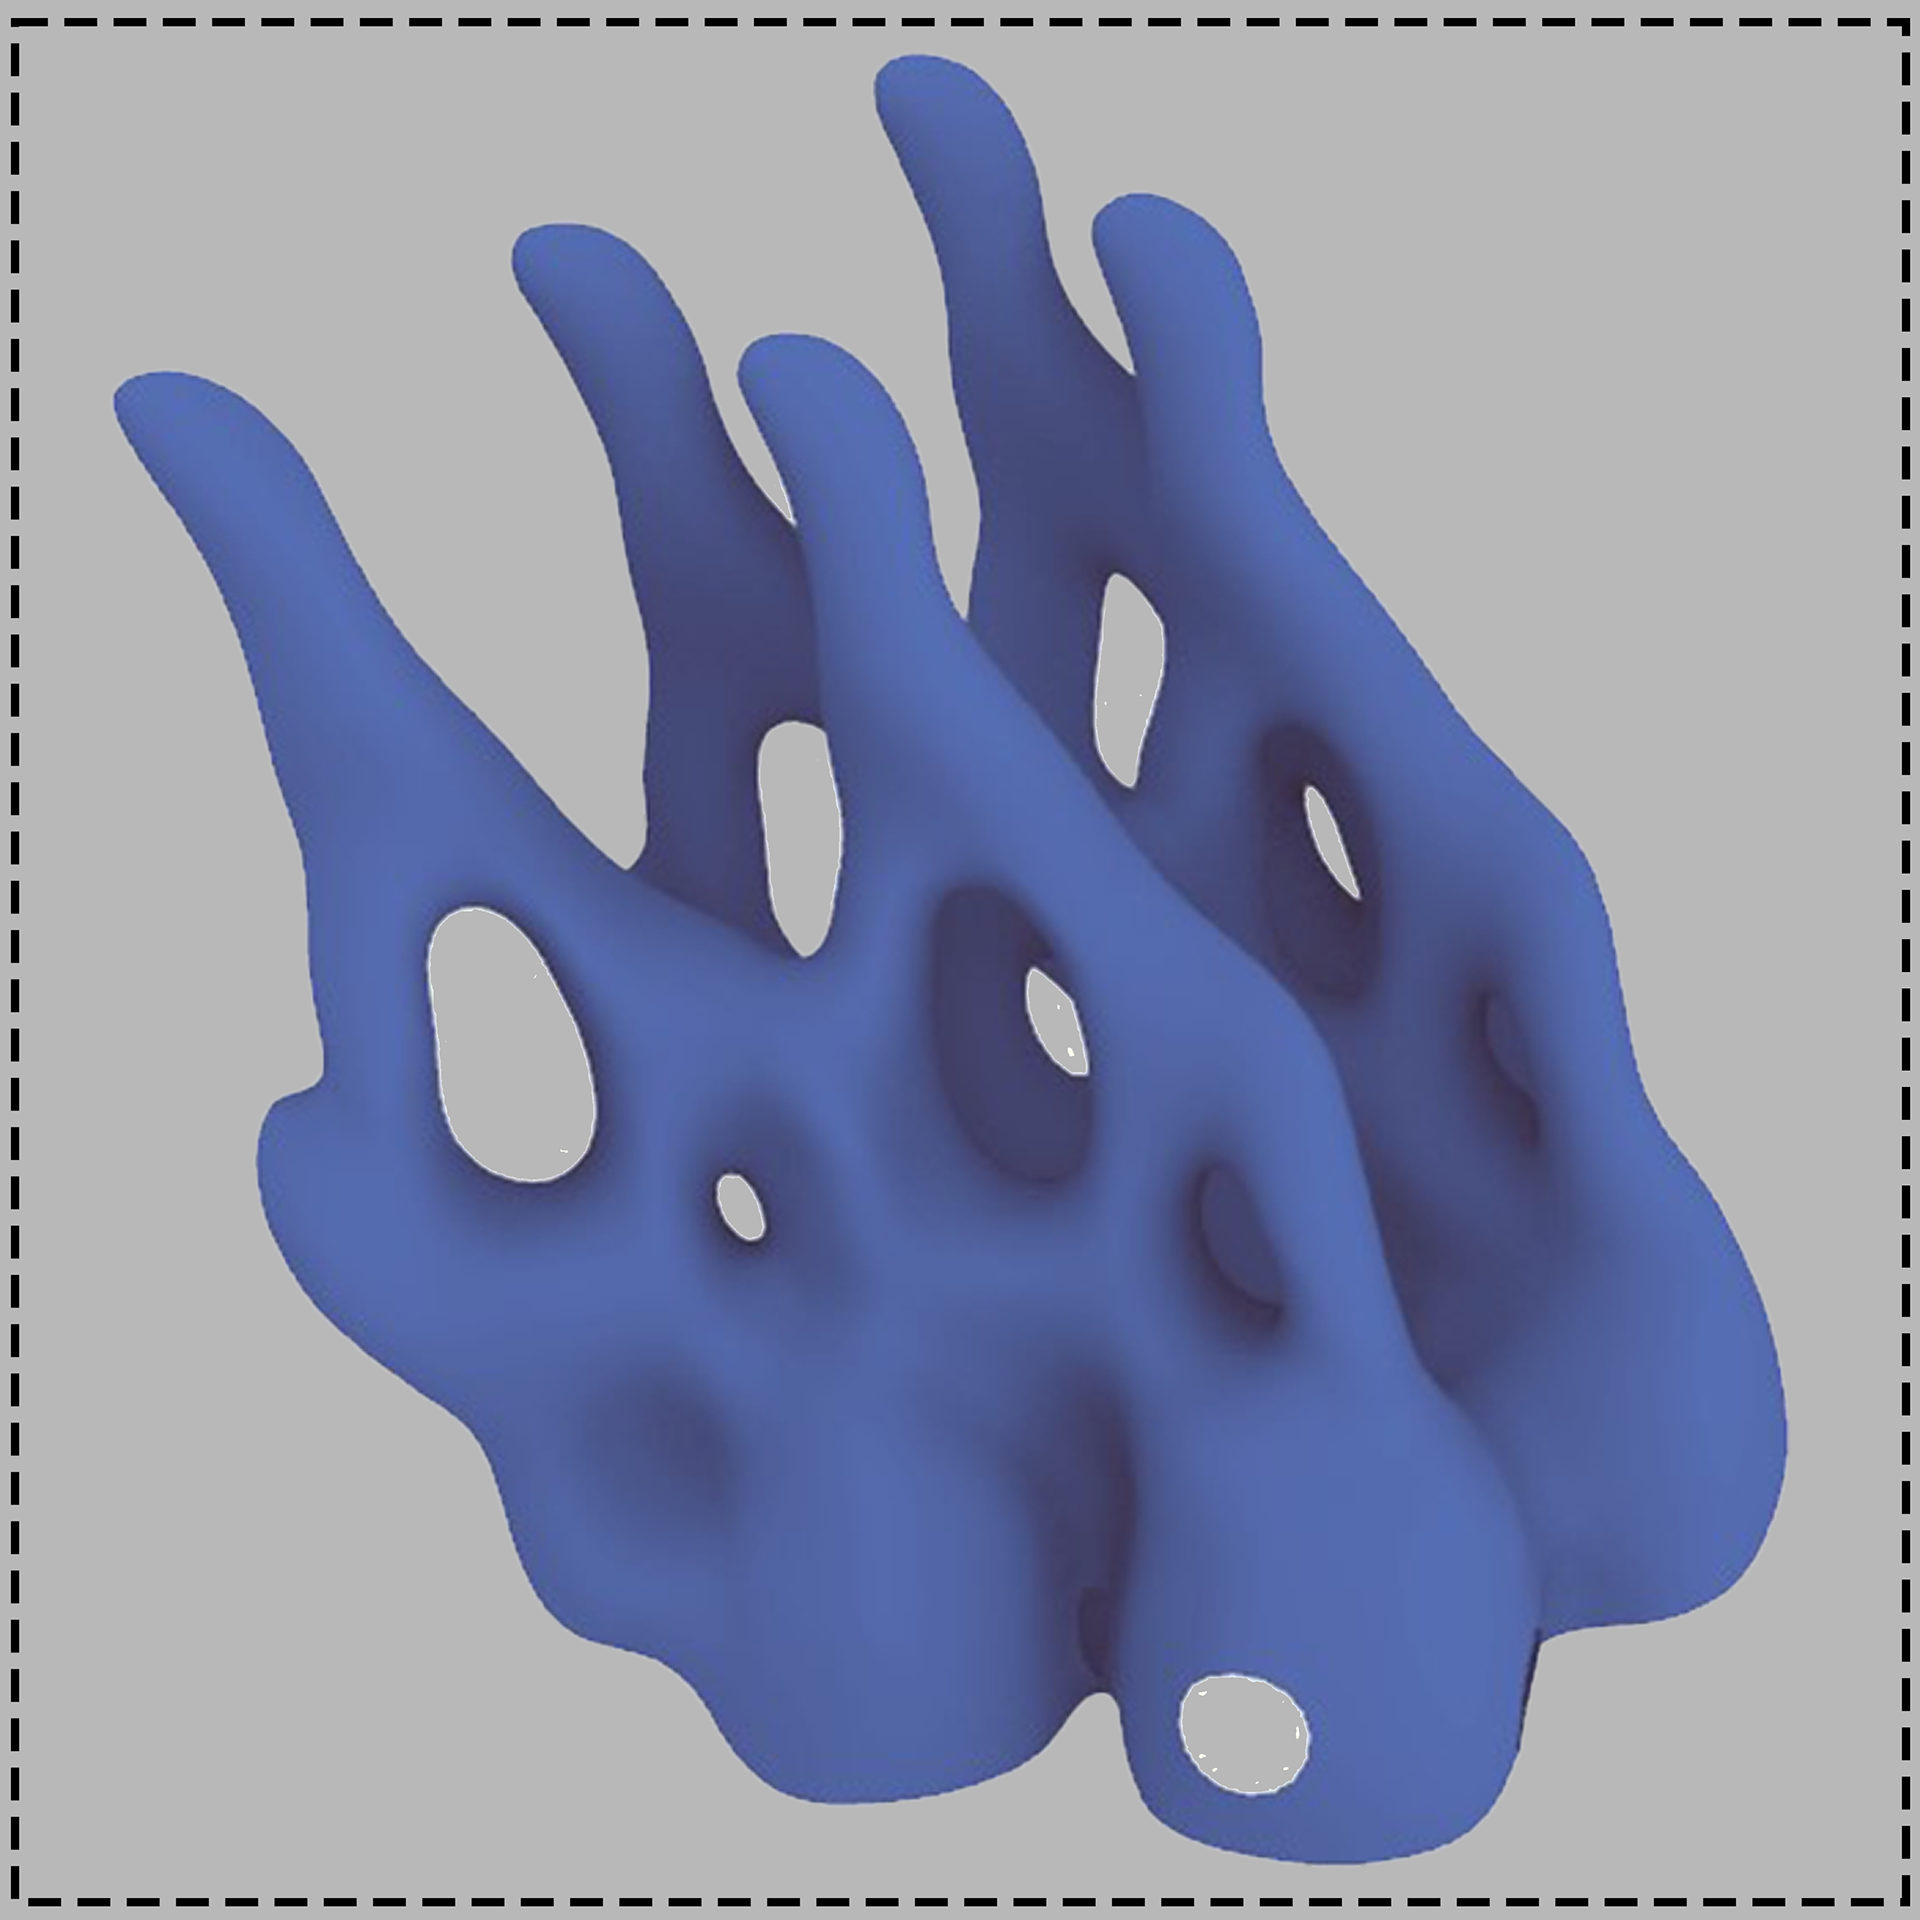
The façade design began with reinventing the notion of emulating nature using Multi-agent System ideation, resulting in a complicated geometry that functions as a masonry wall.
This project consorts weirdness into everyday life. Eccentric and peculiar designs amalgamate to introduce unfamiliar results, with a concept familiar since olden times. The overall form retains its integrity, but the discrete elements can be distinguished, further seeking a balance between component and form.
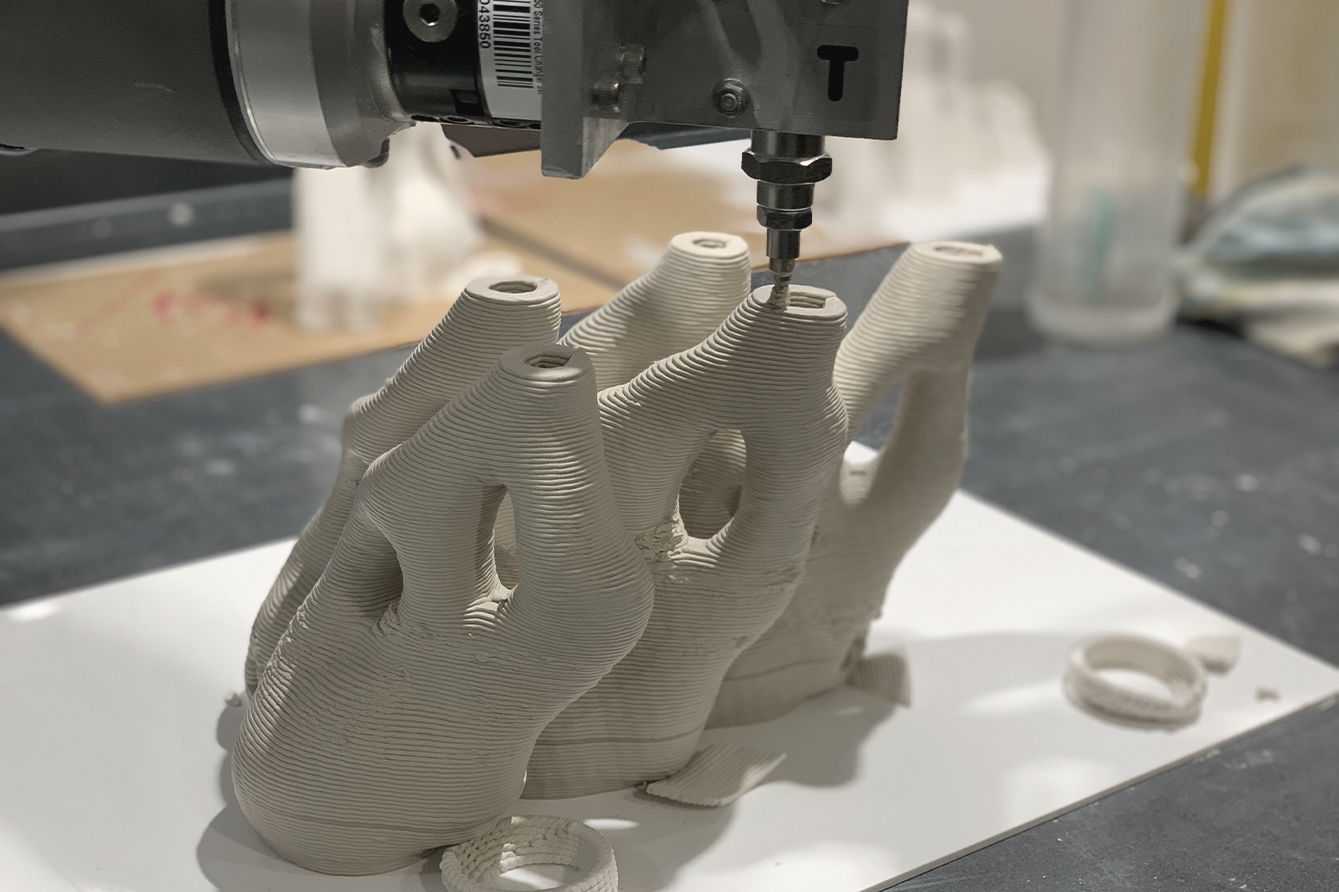
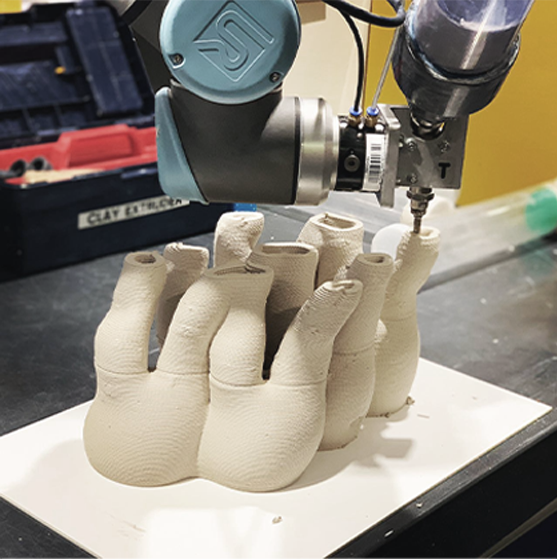
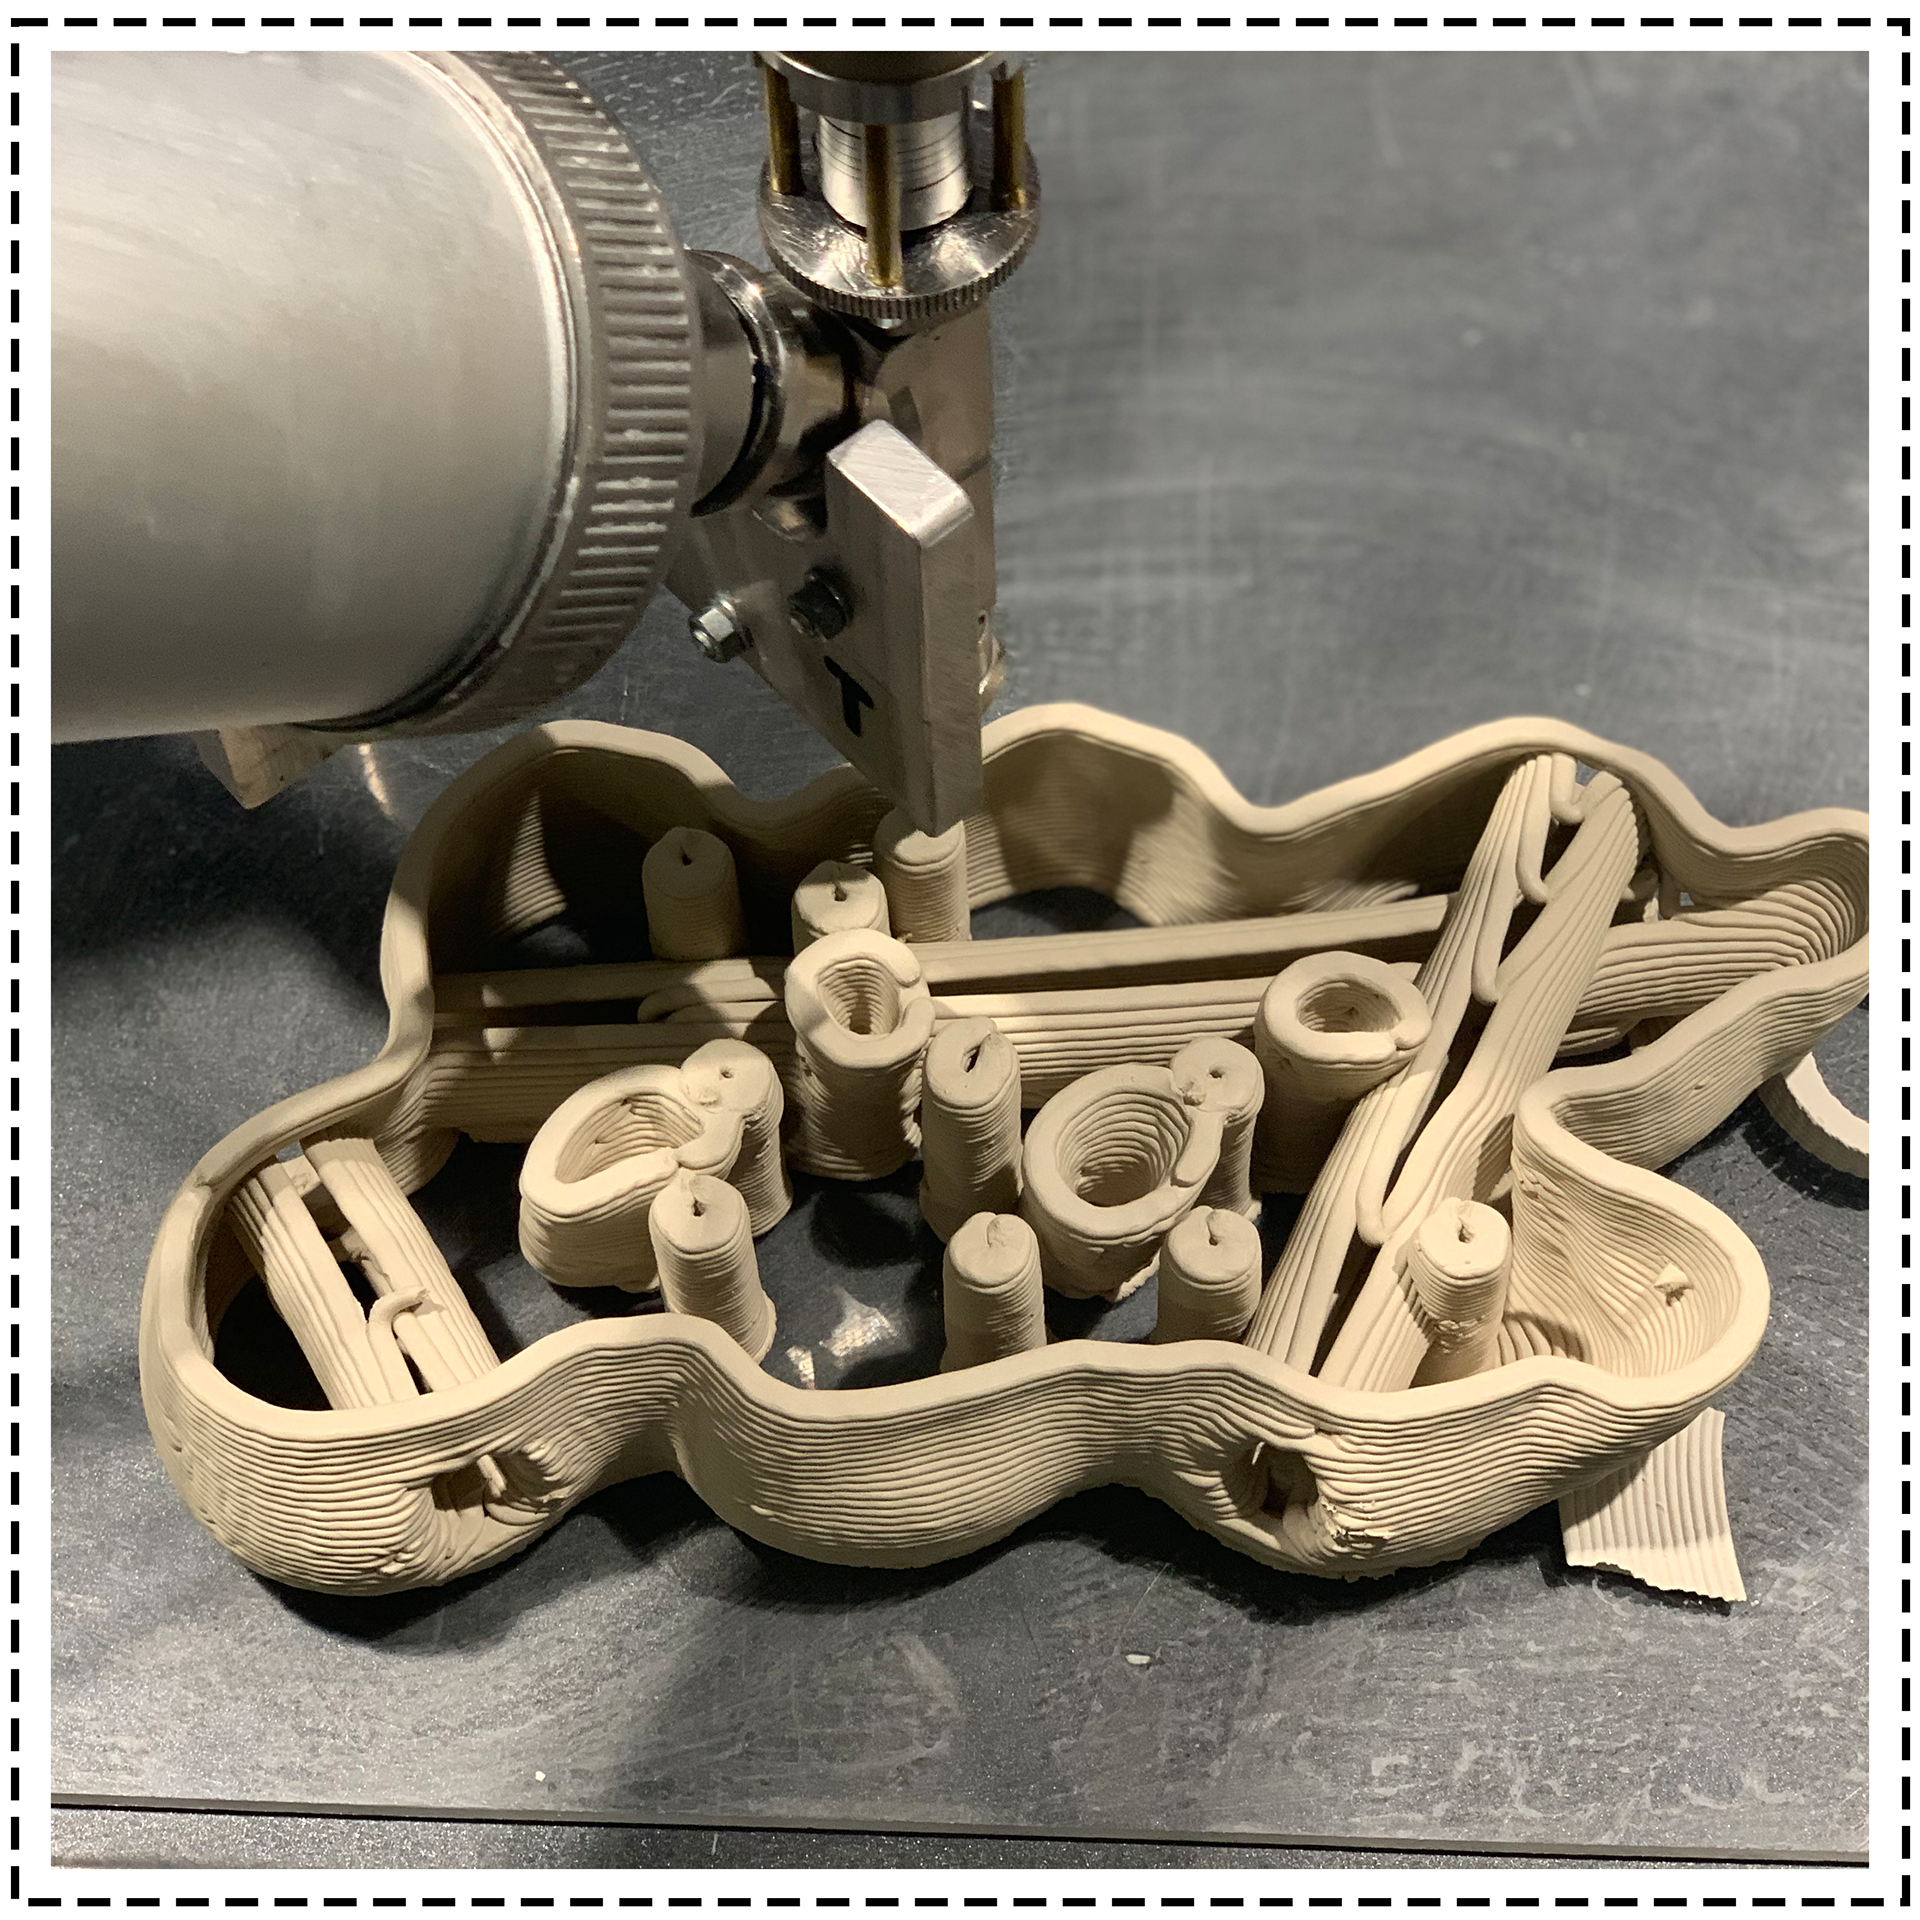
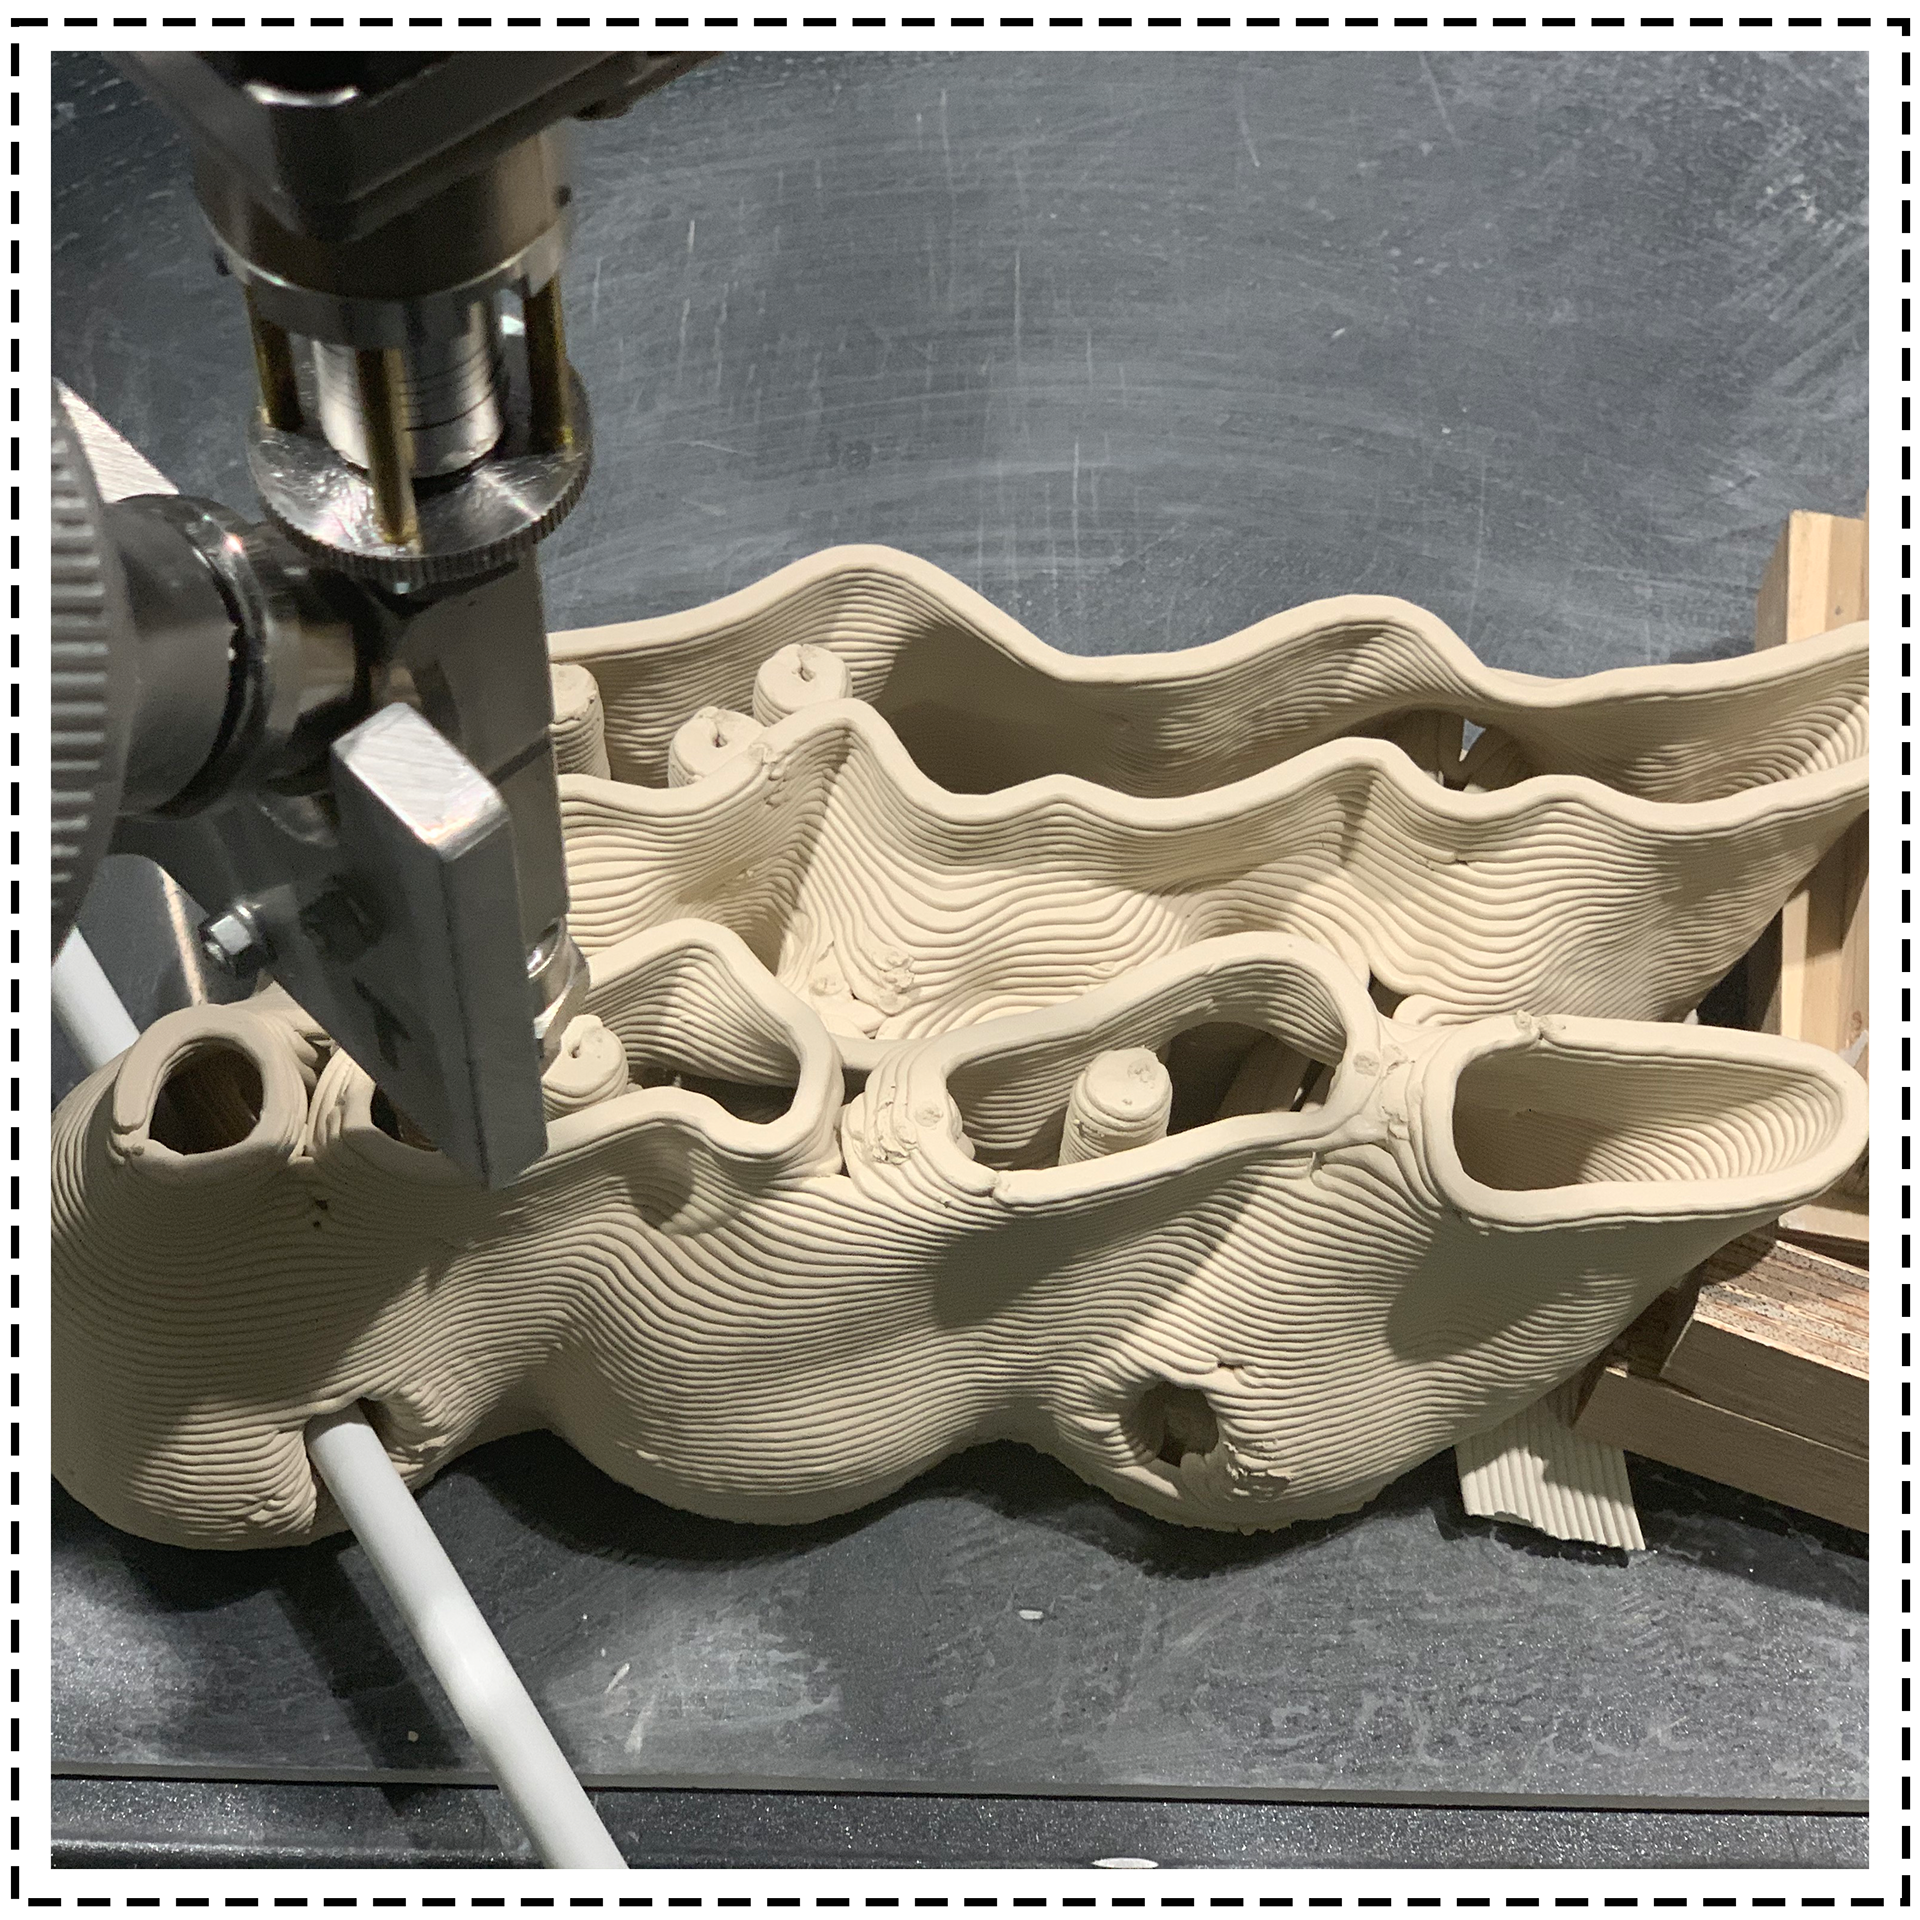
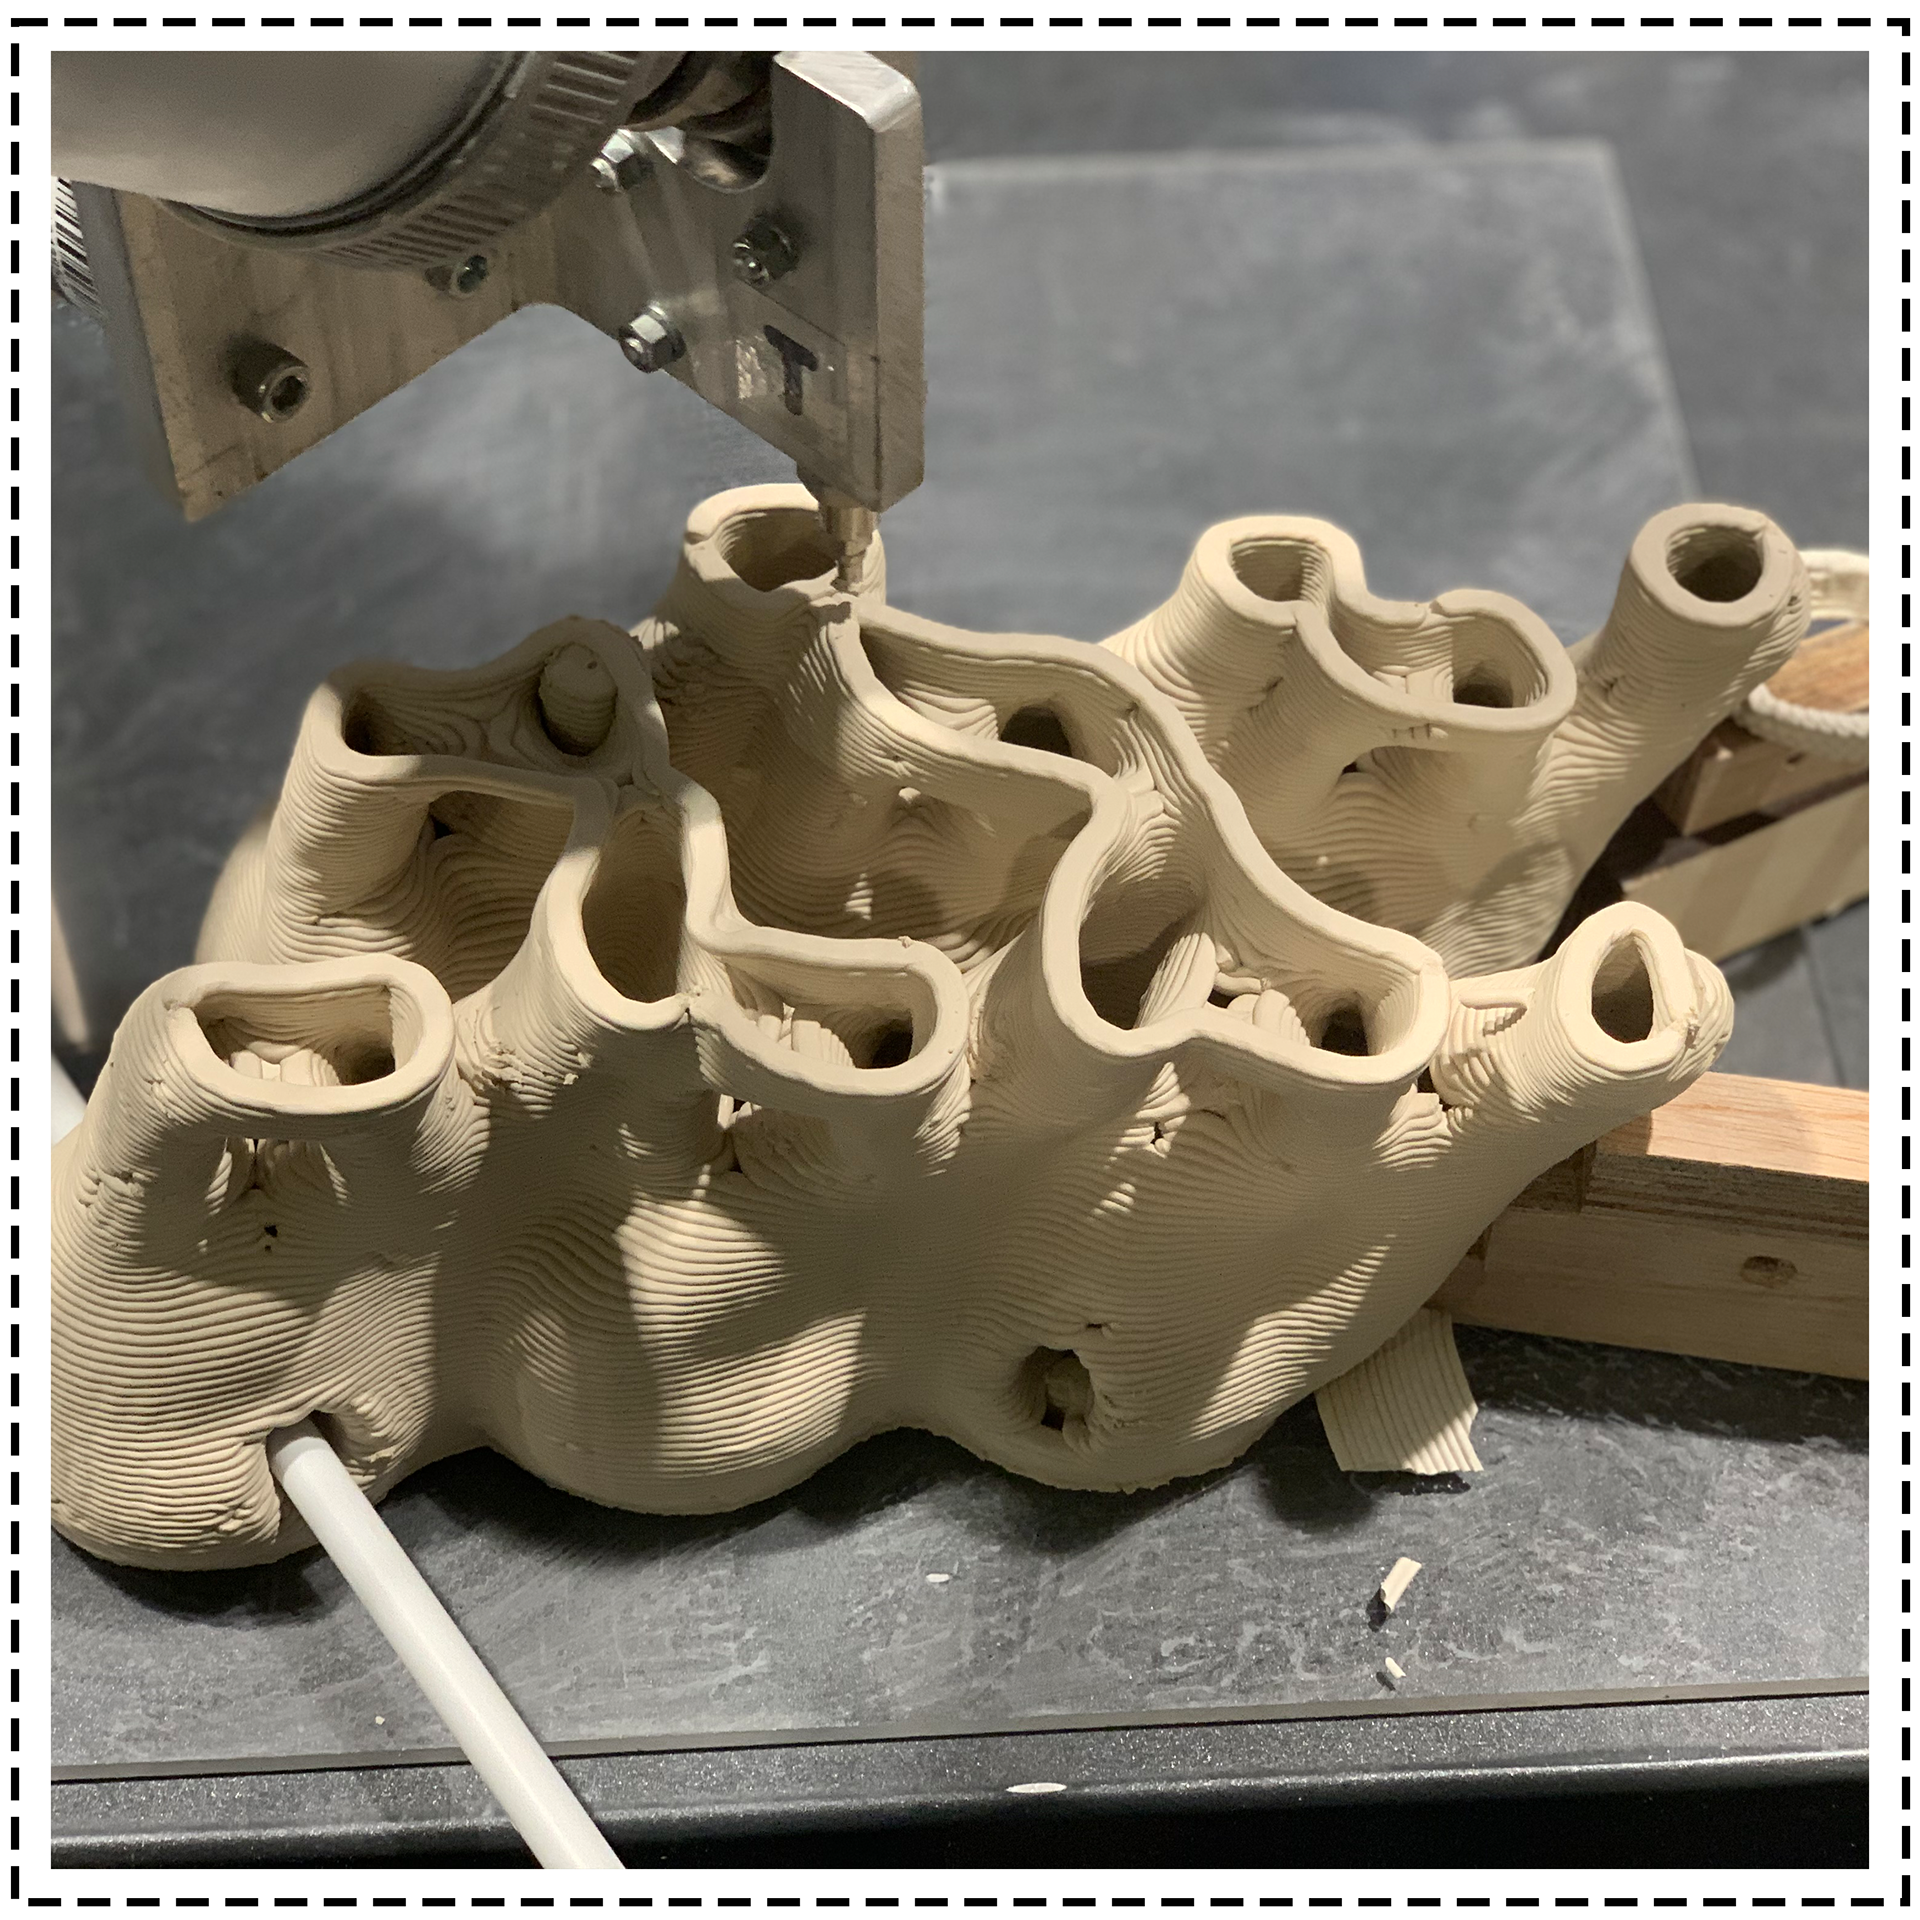
Step #2: Printing a 3D prototype
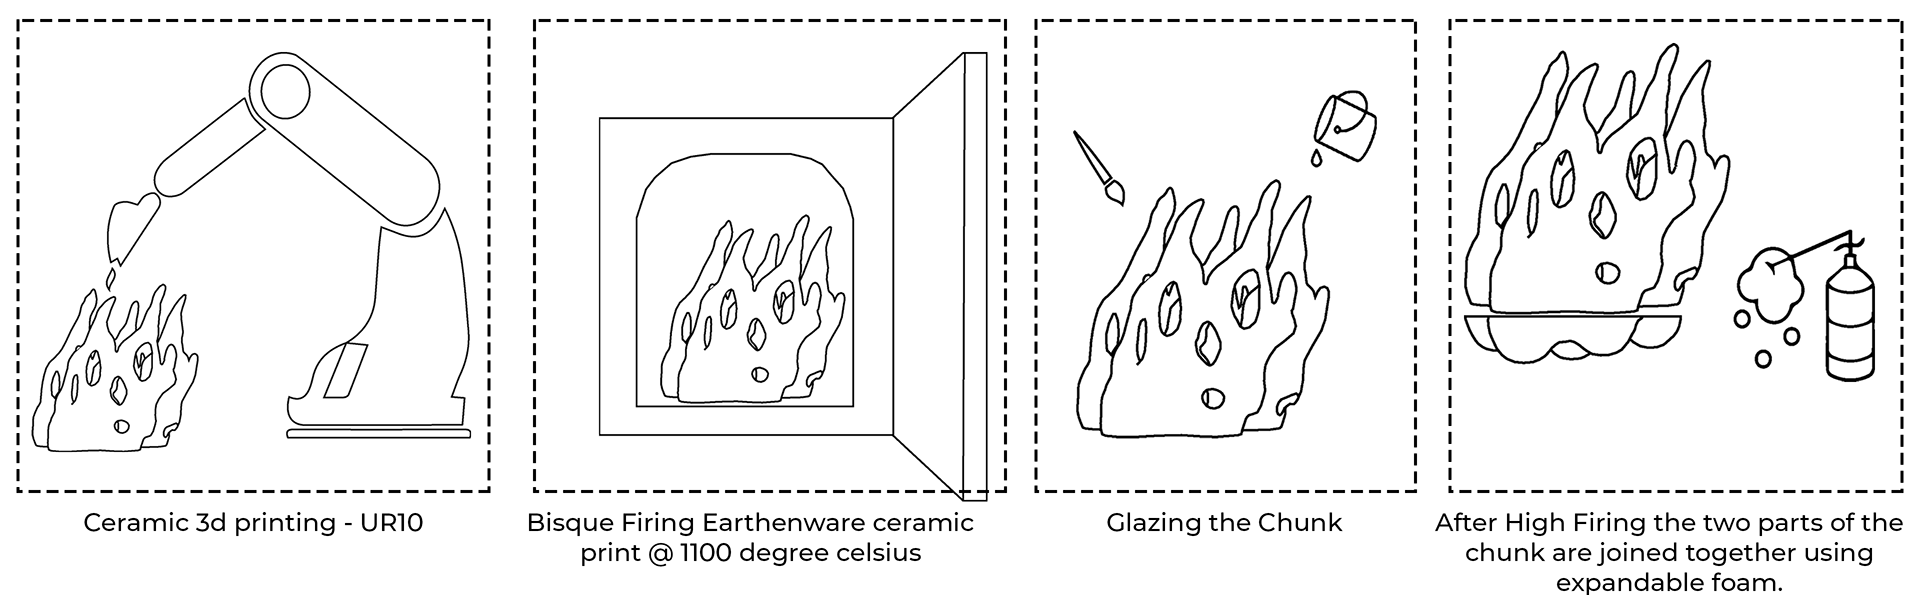
The next step for physically printing the whole form was to break it down into smaller discrete chunks which can fit into the printing volume of the UR-10 Clay extruder. For the purpose of testing 4 different chunks were selected and analyzed for draft angle and after a bit of going back and forth, the chunks were made perfect for printing with clay.
The next step for physically printing the whole form was to break it down into smaller discrete chunks which can fit into the printing volume of the UR-10 Clay extruder. For the purpose of testing 4 different chunks were selected and analyzed for draft angle and after a bit of going back and forth, the chunks were made perfect for printing with clay.
Step #3: Drying the 3D model
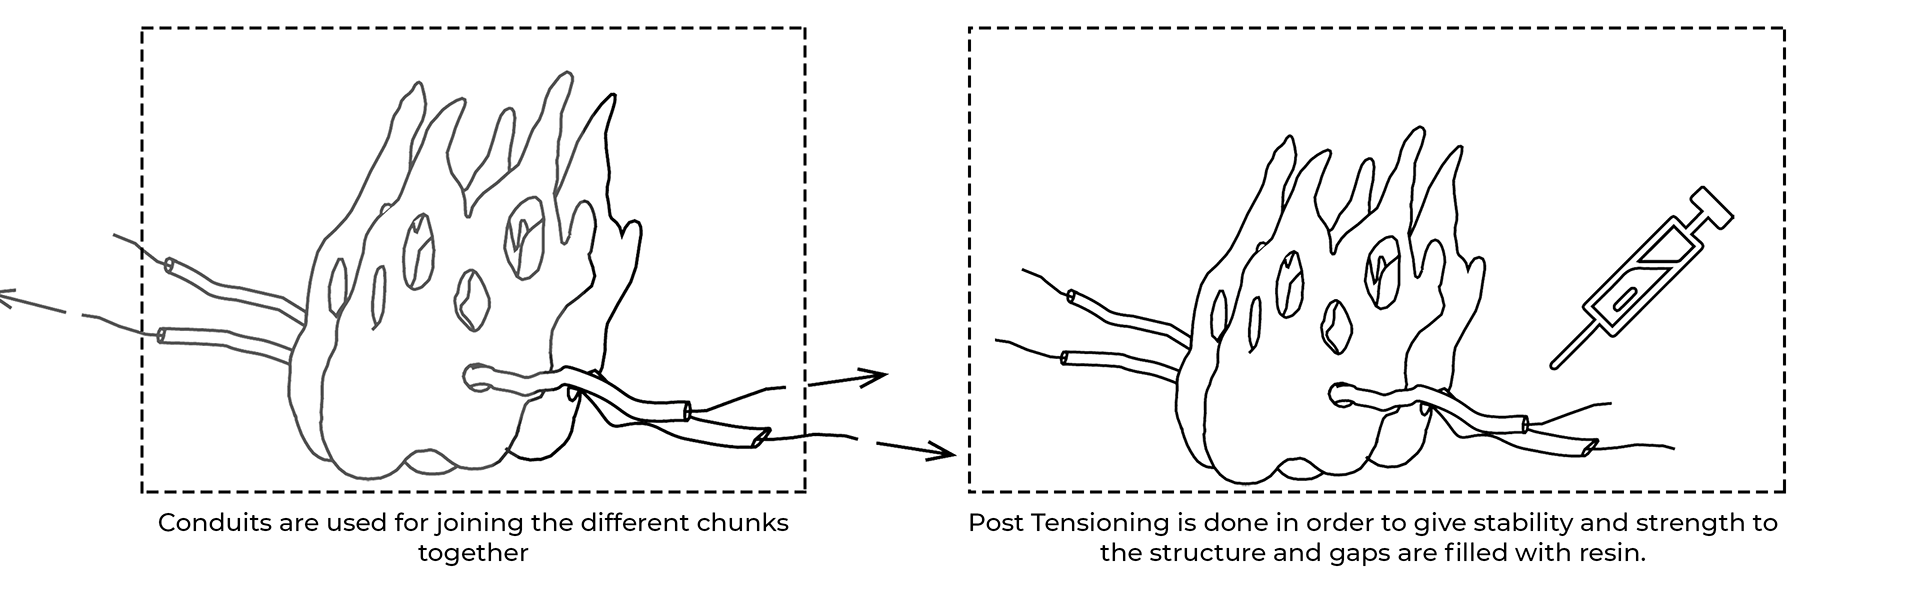
Each chunk was 3D printed in two parts and then brisk fired at 1100 degree Celsius which could be then glazed and then the two parts can be joined together using expandable foam, further conduits were used to reinforce the chunk.
Each chunk was 3D printed in two parts and then brisk fired at 1100 degree Celsius which could be then glazed and then the two parts can be joined together using expandable foam, further conduits were used to reinforce the chunk.
Step #4: Post Processing
Once printed, each unit undergoes rigorous post-processing that includes both handicraft and mechanical finishing to get the appropriate final finish using sanding and glazing.
Once printed, each unit undergoes rigorous post-processing that includes both handicraft and mechanical finishing to get the appropriate final finish using sanding and glazing.
UNDERSTANDING THE STRUCTURE
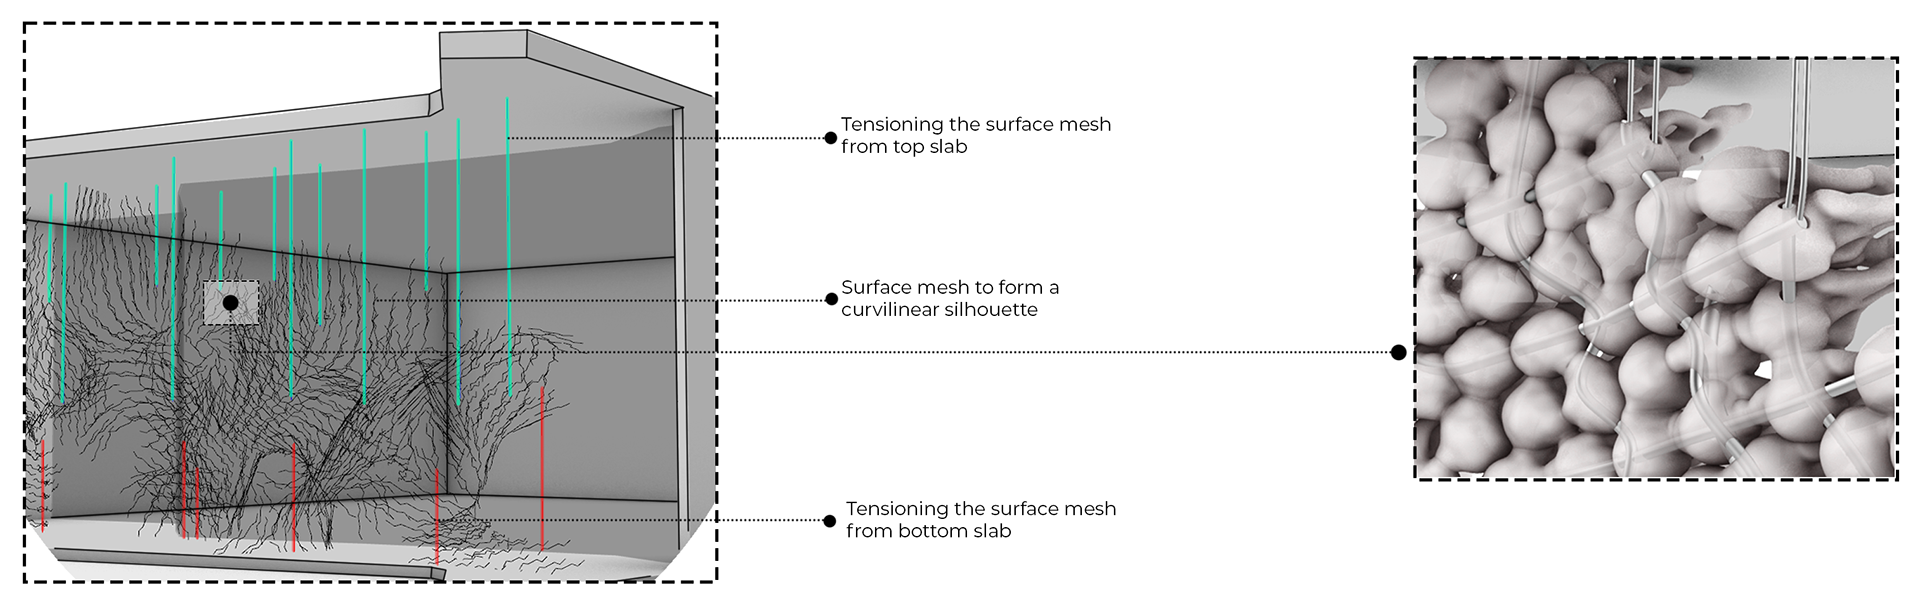
The Structure is designed using Stigmergy Agent Body Script to get a rough idea of the Tensile members hanging out of the concrete shell for the components to attach onto. The component head is the structural part whereas the tail is the ornamental part of the façade to gives it a hairy look on the edges. After so many iterations the shape of the component is derived such that it is easier to cast using ceramic 3d printing.
The Structure is designed using Stigmergy Agent Body Script to get a rough idea of the Tensile members hanging out of the concrete shell for the components to attach onto. The component head is the structural part whereas the tail is the ornamental part of the façade to gives it a hairy look on the edges. After so many iterations the shape of the component is derived such that it is easier to cast using ceramic 3d printing.
REFLECTION
The research presented an integrated approach for customizing ceramic construction components at the individual unit level using the UR10 Robotic Arm for 3D Printing. Despite the fact that ceramic materials have a long and varied history in construction, certain forms continue to be challenging to produce. Although material-specific design parameters and toolpath approaches can improve design outputs, current process-specific challenges limit print size, geometry, and accuracy. Investigation into the design of the printed form and digital workflow may ease some of these constraints, allowing for more geometric and material variety and broadening the applicability of this technology.